I spent several weeks crocheting a cat’s house – a project that used single crochet stitches only. Plenty of them ?.

I got this old wool yarn as a present ? from my best friend and she received it from her relatives, who visited an old ? farm many years ago. It was poorly processed and uncombed wool, probably made by the standards of the 19th century. Or maybe it came from the lower legs of the sheep and was intended to make rugs (the best quality of wool comes from the shoulders and sides of the sheep). My friend could not use this stiff and itchy yarn for anything refined, and she hoped I would create something useful. I put these 3 kg (106 oz) of yarn away… Moths started appearing after several months in my cellar ?.
I put the infested wool in a plastic bag, and placed it inside the freezer for 5 months, and then left it on my balcony for another year. Cloth moths and their larvae could not survive extreme hot and freezing cold temperatures. So, it helped. You would not do it? I could not just throw it away – sustainable use of natural resources is very important. And I felt obliged to make something with it since 100 % wool is rather expensive fiber to produce.
So, when my partner brought this little kitten I thought of using the old yarn for her house ?.

Let’s start on one of evenings!
We will be making a cat’s house with a detachable roof. You probably know that cats choose their own places to sleep and rest. They will regularly move to a different place in your apartment. They like it warm, they like a view, they like caves and confined spaces.
What if your pet ignores the new house? At least you can put 2 round rugs with high borders in her favorite places. Your cat will have a choice and hopefully sleep in one of them ?.
? Feel free to share photos of your finished project: http://mycrochet.conceptcreative.store/
? Please respect my rights. Any reprinting, transmitting, reproducing, publishing or otherwise using for commercial purposes parts of this page is strictly prohibited without my prior written permission.
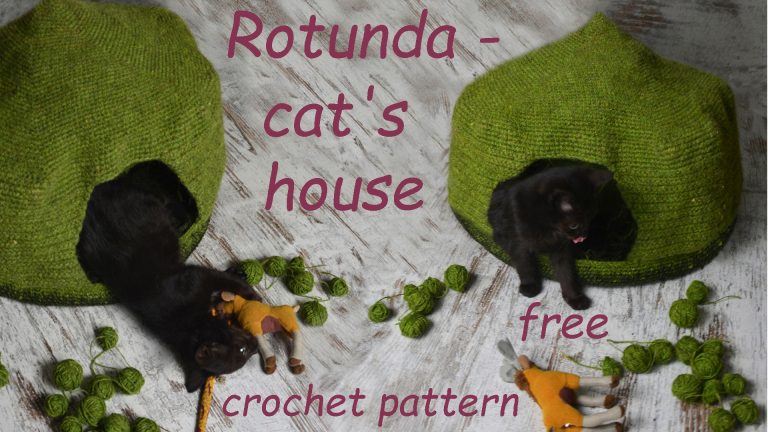
Measurements of the sample shown ?:
42 cm (16.5”) – diameter; 17 cm (6.7”) – width of the entrance measured in its centre; 15 cm (6”) – height of the entrance; 26 cm (10.5”) – height measured from roof’s centre downwards.
If you’d like to enlarge this house continue increasing as described.
My gauge: 14 single crochet stitches in 13 rows = 10 x 10 cm (4” x 4”). Tension (gauge) is not critical in this project since you will crochet until reaching the necessary diameter and the desired height.

Abbreviations (in American crochet terms)?:
ch – chain (s),
st(s) – stitch(es),
sc – single crochet,
R. – round when working in the round or row when working back and forth, prev. R – previous round or row.
Materials ?:
- Measuring tape
You would not wish to end with a smaller or a bigger cat’s house only because you do not have the same yarn and hook and do not crochet with my tension, right? Or because your cat requires more space than mine ?
- Yarn

I held my wool tripped (for making roof and bottom), and quadrupled (for crocheting walls), which means that I worked with 3 or 4 yarn balls at once for having a very stiff fabric that would keep the shape. Yarn that produces 14-15 stitches per 10 cm= 4” (like mine) equals to bulky weight: www.ravelry.com/help/yarn/weights
You will need approximately 1 kilogram (35 oz) of any sturdy wool, acrylic or cotton – something that you got on clearance and would not use anywhere. Or some leftover yarn, stiff yarn, yarn in ugly colors. Hold it double, triple, etc. to make it really stiff ?. Improvise with funny colors to make one of a kind project – follow your intuition and consider it as a meaningful thing.
- Hook
I used 4 mm metal hook (G in the USA) which means that I crocheted with a smaller hook than is usually recommended for this yarn-weight.Take metal hook that is thinner than recommended for the chosen yarn weight – again, the cat’s house should be really stiff! Plastic hooks will surely break.
A rule is: if this house would be very easy and comfortable to crochet (using a bigger hook) it won’t stand straight unless you wish to make some metal carcass for it.
I hold my hook like a pencil, so plain metal hook works best for me. Hooks with ergonomic (or not) handles are not that comfortable… No matter how other crocheters praise them on the internet ?.
- Adhesive sticky Hook & Loop tape fastener for the removable roof.
Buy and sew it when the cat’s house is finished. The required length equals to the length of the house (all around) minus the width of the entrance (minus 15 cm = 6”) search for the tape on the internet.
Instead of the sticky tape you can sew the upper part along its bottom to the borders of the bottom part. Remove the sewing if your cat wants to have two round rugs.
- 3 markers.
I usually mark stitches and rows with simple safety pins and keep them in a box. It’s practical and you won’t loose them. Simplest instruments like cheap metal hooks, plain scissors, robust safety pins never distract me from creating these beauties ?.
P.S. ✂️ I don’t mention scissors and sewing needles as required materials for making my patterns – who lives without them? Or wants to be reminded of weaving in loose ends? I’m sure you are a very clever crocheter who covers all loose ends while working next rows of single crochet stitches ?.
Motivation ?:
You’ve surely came across items that were created with positive energy… Girls, when you crochet and frog, your fingers get hurt, your cat plays with yarn balls… and so on, you will laugh about all this nonsense about positive energy ?. Masochistic activity ?? Kind off, so think of some purpose, ponder on something important in your life, consider it as mediation or listen to a smart audio book to break the monotony.
- I enjoined listening ? to Thinking, Fast and Slow by Daniel Kahneman, which is currently on Youtube (not sure whether this 21-hours audio book will be available while you crochet, so just search for it). In 2002 Daniel Kahneman has received the Nobel Memorial Prize for his work.
- While working on this simple project I tried out several textured stitch patterns:
https://www.instagram.com/p/Bp1b_mAHb-w/
and eventually finished this origami crochet sweater:
https://www.instagram.com/p/BqrY2PQn_oU/
…so, let’s start…
WEEKS 1-2 ? – bottom of the house
Chain 4, slip st in 1st ch to create a ring. Work in the round, in the same direction, mark the end of each R. to avoid mistakes in counting sts. Work into both loops of sc-sts so that your sts are of the same height. The bottom will be stiff (like all crochet items made entirely with rows of sc-sts), which is just perfect for sturdy bags and rugs.

R.1: 1 ch (does not count as 1 sc), 6 sc into the ring, slip st in 1st ch of this R (= 6 sc).
R.2: 1 ch (does not count as 1 sc), then work 2 sc into each sc, finish with slip st in 1st ch of this R (= 12 sc).
R.3: 1 ch (does not count as 1 sc), *2 sc in 1 sc, 1 sc in next sc*, repeat from * to * across the R, finish with slip st in 1st ch (= 18 sc).
R.4: 1 ch (does not count as 1 sc), *2 sc in 1 sc, 1 sc in each of next 2 sc*, repeat from * to * across the R, finish with slip st in 1st ch (= 24 sc).
R.5: 1 ch (does not count as 1 sc), *2 sc in 1 sc, 1 sc in each of next 3 sc*, repeat from * to * across the R, finish with slip st in 1st ch (= 30 sc).
R.6: 1 ch (does not count as 1 sc), *2 sc in 1 sc, 1 sc in each of next 4 sc*, repeat from * to * across the R, finish with slip st in 1st ch (= 36 sc).
Continue adding sts in the same manner, so that each R. has plus 6 sts. For easier counting write down the amount of sc-sts that you work without increasing – 1 sc in each of next 5 sc, 6 sc, 7 sc, 8 sc, and so on.
The piece should always lay flat; if it does not, then
- you probably crochet with different tension (several sts are tight while others are loose);
- your yarn has not even structure (in some parts thinner or thicker, therefore some of sts are thinner and some – thicker);
- or you worked more/fewer sts in previous row – marking or writing down all increases should help.
You can increase more (by working 2 sc into 1 sc) if your piece does not lay flat.
Beginner-crocheters might confuse slip st and 1 ch in the beginning and work sc-sts into them, thus the amount of sc-sts will be more then needed. If you experience such a problem, try a simpler method of working rounds of sc-sts:
R.1: 6 sc into the ring, continue working in spiral (= 6 sc).
R.2: work 2 sc into each sc, continue working in spiral (= 12 sc).
R.3: *2 sc in 1 sc, 1 sc in next sc*, repeat from * to * across the R, continue working in spiral (= 18 sc).
R.4: *2 sc in 1 sc, 1 sc in each of next 2 sc*, repeat from * to * across the R, continue working in spiral (= 24 sc).
R.5: *2 sc in 1 sc, 1 sc in each of next 3 sc*, repeat from * to * across the R, continue working in spiral (= 30 sc).
R.6: *2 sc in 1 sc, 1 sc in each of next 4 sc*, repeat from * to * across the R, continue working in spiral (= 36 sc).
Continue adding sts in the same manner, so that each R. has plus 6 sts.
In the sample shown the bottom was increased until it’s diameter reached 42 cm (16.5”).
Then crochet straight without increases – place 1 st into each st, finish with slip st. Work this way until the bottom reaches 5 cm (2”). These will be the borders of the bottom, which I worked with yarn held quadrupled.


The bottom of the house is finished!
I know, this was rather boring ?…And your fingers might hurt a bit. Give your cat this bottom piece to sleep on – maybe she does not need a roof? ?
I suggest to spend several days resting – you really deserve it! ? If your cat is anxiously waiting for the roof – continue crocheting when your fingers are OK.
WEEKS 3-4 ? – roof (Rotunda)
Chain 3, slip st in 1st ch to create a ring. Work in the round, in the same direction, mark the end of each R:
R.1: 1 ch (does not count as 1 sc), 5 sc into the ring, slip st in 1st ch of this R (= 5 sc).
R.2: 1 ch (does not count as 1 sc), then work 2 sc into each sc, finish with slip st in 1st ch of this R (= 10 sc).
R.3: 1 ch (does not count as 1 sc), *2 sc in 1 sc, 1 sc in next sc*, repeat from * to * across the R, finish with slip st in 1st ch (= 15 sc).
R.4: 1 ch (does not count as 1 sc), *2 sc in 1 sc, 1 sc in each of next 2 sc*, repeat from * to * across the R, finish with slip st in 1st ch (= 20 sc).
R.5: 1 ch (does not count as 1 sc), *2 sc in 1 sc, 1 sc in each of next 3 sc*, repeat from * to * across the R, finish with slip st in 1st ch (= 25 sc).
R.6: 1 ch (does not count as 1 sc), *2 sc in 1 sc, 1 sc in each of next 4 sc*, repeat from * to * across the R, finish with slip st in 1st ch (= 30 sc).

Continue adding sts in the same manner, so that each R. has plus 5 sts. For easier counting write down the amount of sc-sts that you work without increasing – 1 sc in each of next 5 sc, 6 sc, 7 sc, 8 sc and so on. The roof will have 5 sectors with visible increases along each sector, the centre will be raised a bit.
You can follow simplified method for beginners (described for the bottom, but increase 5 sts in each R).
In the sample shown the top was increased until it’s diameter reached 42 cm (16.5”) – the same as the bottom. Then crochet straight without increases – place 1 st into each st, finish with slip st. Work this way until the roof reaches 5 cm (2”).
…The roof is putting me to sleep …?.
WEEKS 5-6 ? – walls of the house
 Mark 10 cm (4″) in the centre of one sector (I marked it with 2 safety pins). This will be the upper part of the entrance. For a bigger cat you can mark more sts.
I worked walls with yarn held quadrupled.
Crochet sc-sts up to first marker, there turn the work over and crochet in the opposite direction till next marked st. 10 cm (4″) in the centre remain unworked.

Count the amount of skipped sts in the centre (= 15 sts in the sample shown). Now work back and forth, shaping the entrance:
R.1: skip 1 st, work 1st sc in next st, 1 sc in each st up to second marker, turn (= minus one st at one side).
R.2: skip 1 st, work 1st sc in next st, 1 sc in each st up to last st of prev. R (next to first marker), turn (= minus one st at one side).


R.3: skip 1 st, work 1st sc in next st, 1 sc in each st up to last st of prev. R (next to second marker), turn (= minus one st at one side).
R.4: skip 1 st, work 1st sc in next st, 1 sc in each st up to last st of prev. R, turn (= minus one st at one side).
Repeat R.4 until the distance between last and first sts is slightly wider than your grown-up cat (17 cm (6.7”) in the sample shown).


Then crochet straight, working 1 sc in each sts without skipping first st until the entrance is slightly higher than your cat (15 cm (6”) in the sample shown).
The roof is detachable, so you can always add more rows for a bigger cat ?.
For the removable roof sew adhesive sticky Hook & Loop tape fastener as follows:
- one part of the tape to the borders of the bottom (to the outside, covering last completed rows of the wall).
- another part of the tape along the bottom of the wall of the upper part (to the inside, covering last completed rows of the wall).
Or sew the edges of the upper part to the edges of the bottom part using sewing thread of similar color. You can always undo the seam for washing each part or for working more rows when your cat gets bigger.
Alas, I have not made photos of sewing. Just cover the bottom walls with the upper part so that the fastener connects both parts of the house.
Hopefully, your cat likes the new house!


Thank you for sharing it!
Nice post!
I came across your Rotunda cat’s house – thank you for this beautiful pattern!
Such a lovely kitten!
cute
Thanks for this post
cute!
Thank You for this.
Thanks for the wonderful guide