***
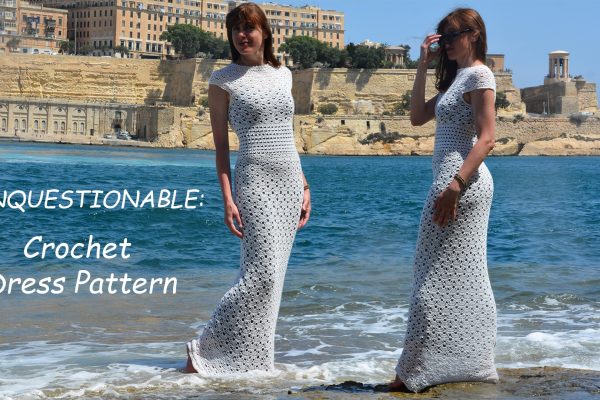
Every crafter has once in a while the same question: what to do with leftover bits of yarn? ??♀️ Very small pieces of matching colours can be used for creating one-of-a-kind garments like this avant-garde top.
A great way to get rid of one 50 gr = 1.75 skein of thin wool or wool/acrylic yarn is knitting something in Shetland lace technique. Why not to give your hands some break from crocheting items that require tight stitching like bags, hats or amigurumis and concentrate on knitting light subtle stitches instead? ?
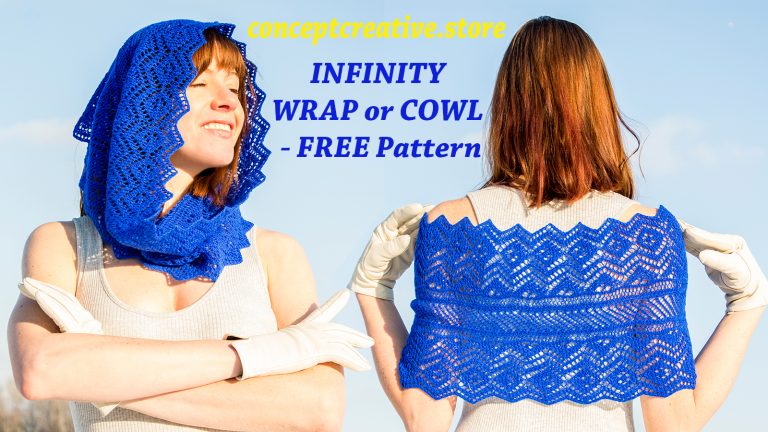
Yarn usage is quite economical which will be important when using some expensive fibres. This infinity scarf weighs 45 gr = 1.6 oz only and fits sizes S/M. For plus sizes you will need 10-20 gr. more – knit it until the garment fits your shoulders and does not slip down. I’d recommend using wool or wool/acrylic as silk or rayon wrap will tend to slip from your shoulders.
It’s one of my favourite accessories for the infinite amount of styling opportunities. Its minimal, clean lines and size are perfect for transforming it into a Shoulder warmer or a Shrug during chilly summer evenings or wear it as a Headpiece, Cowl or Neck warmer in winter – all ways look interesting. It doesn’t weigh much, so you can always put in a bag just in case you feel cold in the evening.?


PLEASE,
► DO NOT publish this pattern on your websites or claim as your own, but feel free to share this link with your friends: https://conceptcreative.club.gothicus.metanet.ch/2023/02/24/INFINITY-WRAP-or-COWL-FREE-Pattern
► Any translation should be discussed with me and eventually published on this website. I can credit you as a translator of each particular version and give respective link to your blog. I do not give the rights of publishing any translated version as your own free pattern (in such cases all necessary actions will be taken to remove search referrals to your website)
► DO share photos of your finished garment here http://mycrochet.conceptcreative.store
► ADD this project to your Ravelry queue: www.ravelry.com/patterns/library/infinity-wrap-3
► Copyright © All rights reserved. Any reprinting, transmitting, reproducing, publishing or otherwise using for commercial purposes parts of this written pattern is strictly prohibited without my prior written permission
►This FREE tutorial is written, charts are not included, instructions are available in English only
► The instructions in both written and charted formats are available for a small fee: link to download – chart allows to see all 20 repeated rows of this pattern at once.
SHETLAND LACE WRAP or COWL:
This garment is knitted in Shetland lace technic where all stitches are worked on right and wrong sides, thus this pattern is reversible:

Measurements of the sample shown:
Length 30 cm = 11.8’’; width all around approx. 100 cm = 39.5’’.
The wrap is very stretchy – the same width stretches sideways to 140 cm = 55’’. For adjusting the width for plus sizes work more rows in each panel.
Gauge:
The length of one pattern repeat worked across 23 stitches in 20 rows is 5 cm = 2’’; the width of rows 10-12 is 13 cm = 5.1’’ in a normal (not stretched) condition.

Materials:
Yarn in photos: 50 gr = 240 m = 262 yards of 100 % merino wool yarn approx. 480 m in 100 gr = 524 yards in 3.5 oz = 3 ply (UK) = light fingering weight (USA). Wool/acrylic or wool/cashmere yarn of similar weight will be perfect too.
The cowl is adjustable in size, but this will affect the amount of yarn needed.
Scrap yarn: approx. 1.5 m = 1.6 yards of any fingering-weight cotton, acrylic or linen yarn that is not intended for other projects.
Needles used by the designer: 3 mm (US size 3) for each panel; circular knitting needle 2.5 mm for all connecting rows. Your tension can differ due to individual knitting style, even if you use the same needles.
Additional hook 3 mm for working provisional foundation chain.

Abbreviations:
ch – chain (s),
sts – stitch (es),
yo – yarn over,
p – purl, k – knit,
k2tog – knit two sts together,
* – repeat sts from * to *,
k2tog (left) – knit two together (decrease leans to the left): slip 1 st; knit next st and pass slip st over knit st.
k2tog (right) – knit two together (decrease leans to the right): knit two together inserting the needle from the side of 2nd st.
k3tog – knit three together (with the 2nd st placed on top of other two sts): place the 2nd st before the 1st st and knit 3 together.
Edge sts: work first and last sts the way you are used to. I usually purl last st and slip first one.
Notes on Construction:
This item is knitted in several stages:

Top Panel 1 is worked from side to side, beginning with a provisional cast on, knitting until the length reaches the circumference of your body (so that you can wear it as a shoulder wrap), and finishing with the joining of the two ends together. One long side of the resulting loop will be straight and another with scallops.
Bottom Panel 2 is made identically.
Finally both panels are joined at their straight sides by several connecting rows so that the scalloped edges appear on the top and bottom of this wrap.
The length of both panels establishes the width of the finished garment, thus for plus sizes you can knit these panels longer. For increasing the length of the wrap, work more connecting rows. Every change will affect the amount of yarn needed.
START:
One Panel (make two):
Take scrap yarn (it will be removed at a later stage), with hook 3 mm chain 23 + 2 additional ch. Fasten off.
Using needles 3 mm and main yarn, pick up 23 sts through the “purl bumps” on the back of the chain. Work as follows:
Row 1: edge st, k2, yo, k2tog (left), yo, k2tog (left), k2, k2tog (right), yo, k2tog (right), yo, k2tog (right), k1, yo, k1, yo, k1, k2tog (left), yo, k2tog (right), edge st (purl).
Row 2 and all even rows 4, 6, 8, 10, 12, 14, 16, 18, 20:
edge st, knit all sts in the row to last 3 sts, yo, k2tog (right), edge st (p).
Row 3: edge st, k2, yo, k2tog (left), k3, k2tog (right), yo, k2tog (right), yo, k2tog (right), k1, yo, k3, yo, k1, k2tog (left), yo, k1, edge st (p).
Row 5: edge st, k2, yo, k2tog (left), k2, k2tog (right), yo, k2tog (right), yo, k2tog (right), k1, yo, k5, yo, k1, k2tog (left), yo, k1, edge st (p).

Row 7: edge st, k2, yo, k2tog (left), k1, k2tog (right), yo, k2tog (right), yo, k2tog (right), k1, yo, k1, k2tog (right), yo, k1, yo, k2tog (left), k1, yo, k1, k2tog (left), yo, k1, edge st (p).
Row 9: edge st, k2, yo, k2tog (left), k2tog (right), yo, k2tog (right), yo, k2tog (right), k1, yo, k1, k2tog (right), yo, k3, yo, k2tog (left), k1, yo, k1, k2tog (left), yo, k1, edge st (p).
Row 11: edge st, k2, yo, k2tog (left), k1, yo, k2tog (left), yo, k2tog (left), k1, yo, k2tog (left), k2, yo, k3tog, yo, k2, k2tog (right), yo, k1, k2tog (right), yo, k1, edge st (p).
Row 13: edge st, k2, yo, k2tog (left), k2, yo, k2tog (left), yo, k2tog (left), k1, yo, k2tog (left), k5, k2tog (right), yo, k1, k2tog (right), yo, k2tog (right), edge st (p).
Row 15: edge st, k2, yo, k2tog (left), k3, yo, k2tog (left), yo, k2tog (left), k1, yo, k2tog (left), k3, k2tog (right), yo, k1, k2tog (right), yo, k2tog (right), edge st (p).
Row 17: edge st, k2, yo, k2tog (left), yo, k2tog (left), k2, yo, k2tog (left), yo, k2tog (left), k1, yo, k2tog (left), k1, k2tog (right), yo, k1, k2tog (right), yo, k2tog (right), edge st (p).
Row 19: edge st, k2, yo, k2tog (left), k1, yo, k2tog (left), k2, yo, k2tog (left), yo, k2tog (left), k1, yo, k3tog, yo, k1, k2tog (right), yo, k2tog (right), edge st (p).
Repeat all 20 rows of the pattern 22 times.

Do not bind off the stitches after completing last row. Remove scrap chain: gently and slowly pull out the tail to unravel all crochet sts, carefully placing each released knit st on a needle. Afterwards cut off main yarn leaving a tail long enough to sew the first with the last row together – join each st on one side with respective st on another. The seam should be almost invisible. Set the first loop aside.
Knit second panel the same way and join first and last rows into a loop.
Join both panels by connecting rows:
Attach main yarn to the seam at straight edge of one panel and insert the circular needles into loops along this straight edge – through all first sts in odd rows and through all last sts in even rows. After you have picked up all stitches, work connecting rows of this wrap in the round, always on the right side.
In the sample shown 220 sts were picked up along the straight edge with 22 rhombuses in one panel (= 10 sts per every 20 rows).
Round 1: knit all sts.
Round 2: *k2tog, yo*, repeat from * all around.
Round 3 and all other rounds: *k2tog (over both k2tog and yo of the previous round), yo*, repeat from * all around.
It does not matter in what direction k2tog are leaning – knit as you like but decrease always in one direction.
Work 10 rounds (or more if you prefer a longer wrap), then cut off yarn leaving a tail of at least 160 cm = 63’’ for the mentioned length of the wrap. With a sewing needle sew sts in last connecting row with the straight edge of already completed panel. Make sure you join each st (including yo) of last connecting row.
Finishing:
With any sewing thread and a needle gather all scalloped edges of the wrap on one side, and then (with another thread) gather scalloped edges on another side; make knots on both thread loops.

Then gently soak, squish and rinse your knit garment in lukewarm water with a small amount of wool detergent. Never put the lace wrap in the washing machine or rub the wool against itself because it will felt. Gently remove the wrap and squeeze out the excessive water (without wringing). Lay flat on a towel to dry, slightly pull both threads at the scalloped edges in the opposite directions. Remove the sewing thread after the wrap is completely dried out.
Happy crafting! ?
HOW to Add Your Project to Ravelry