*****
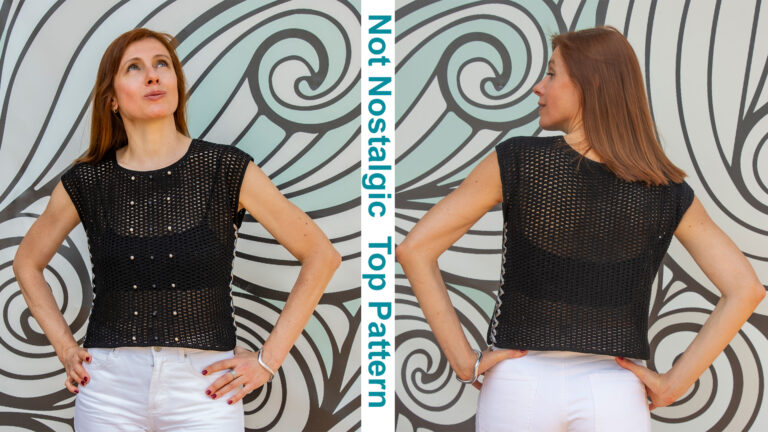
New go-to summer (or winter layering!) Easy Crochet Top Pattern is ready for your hook!
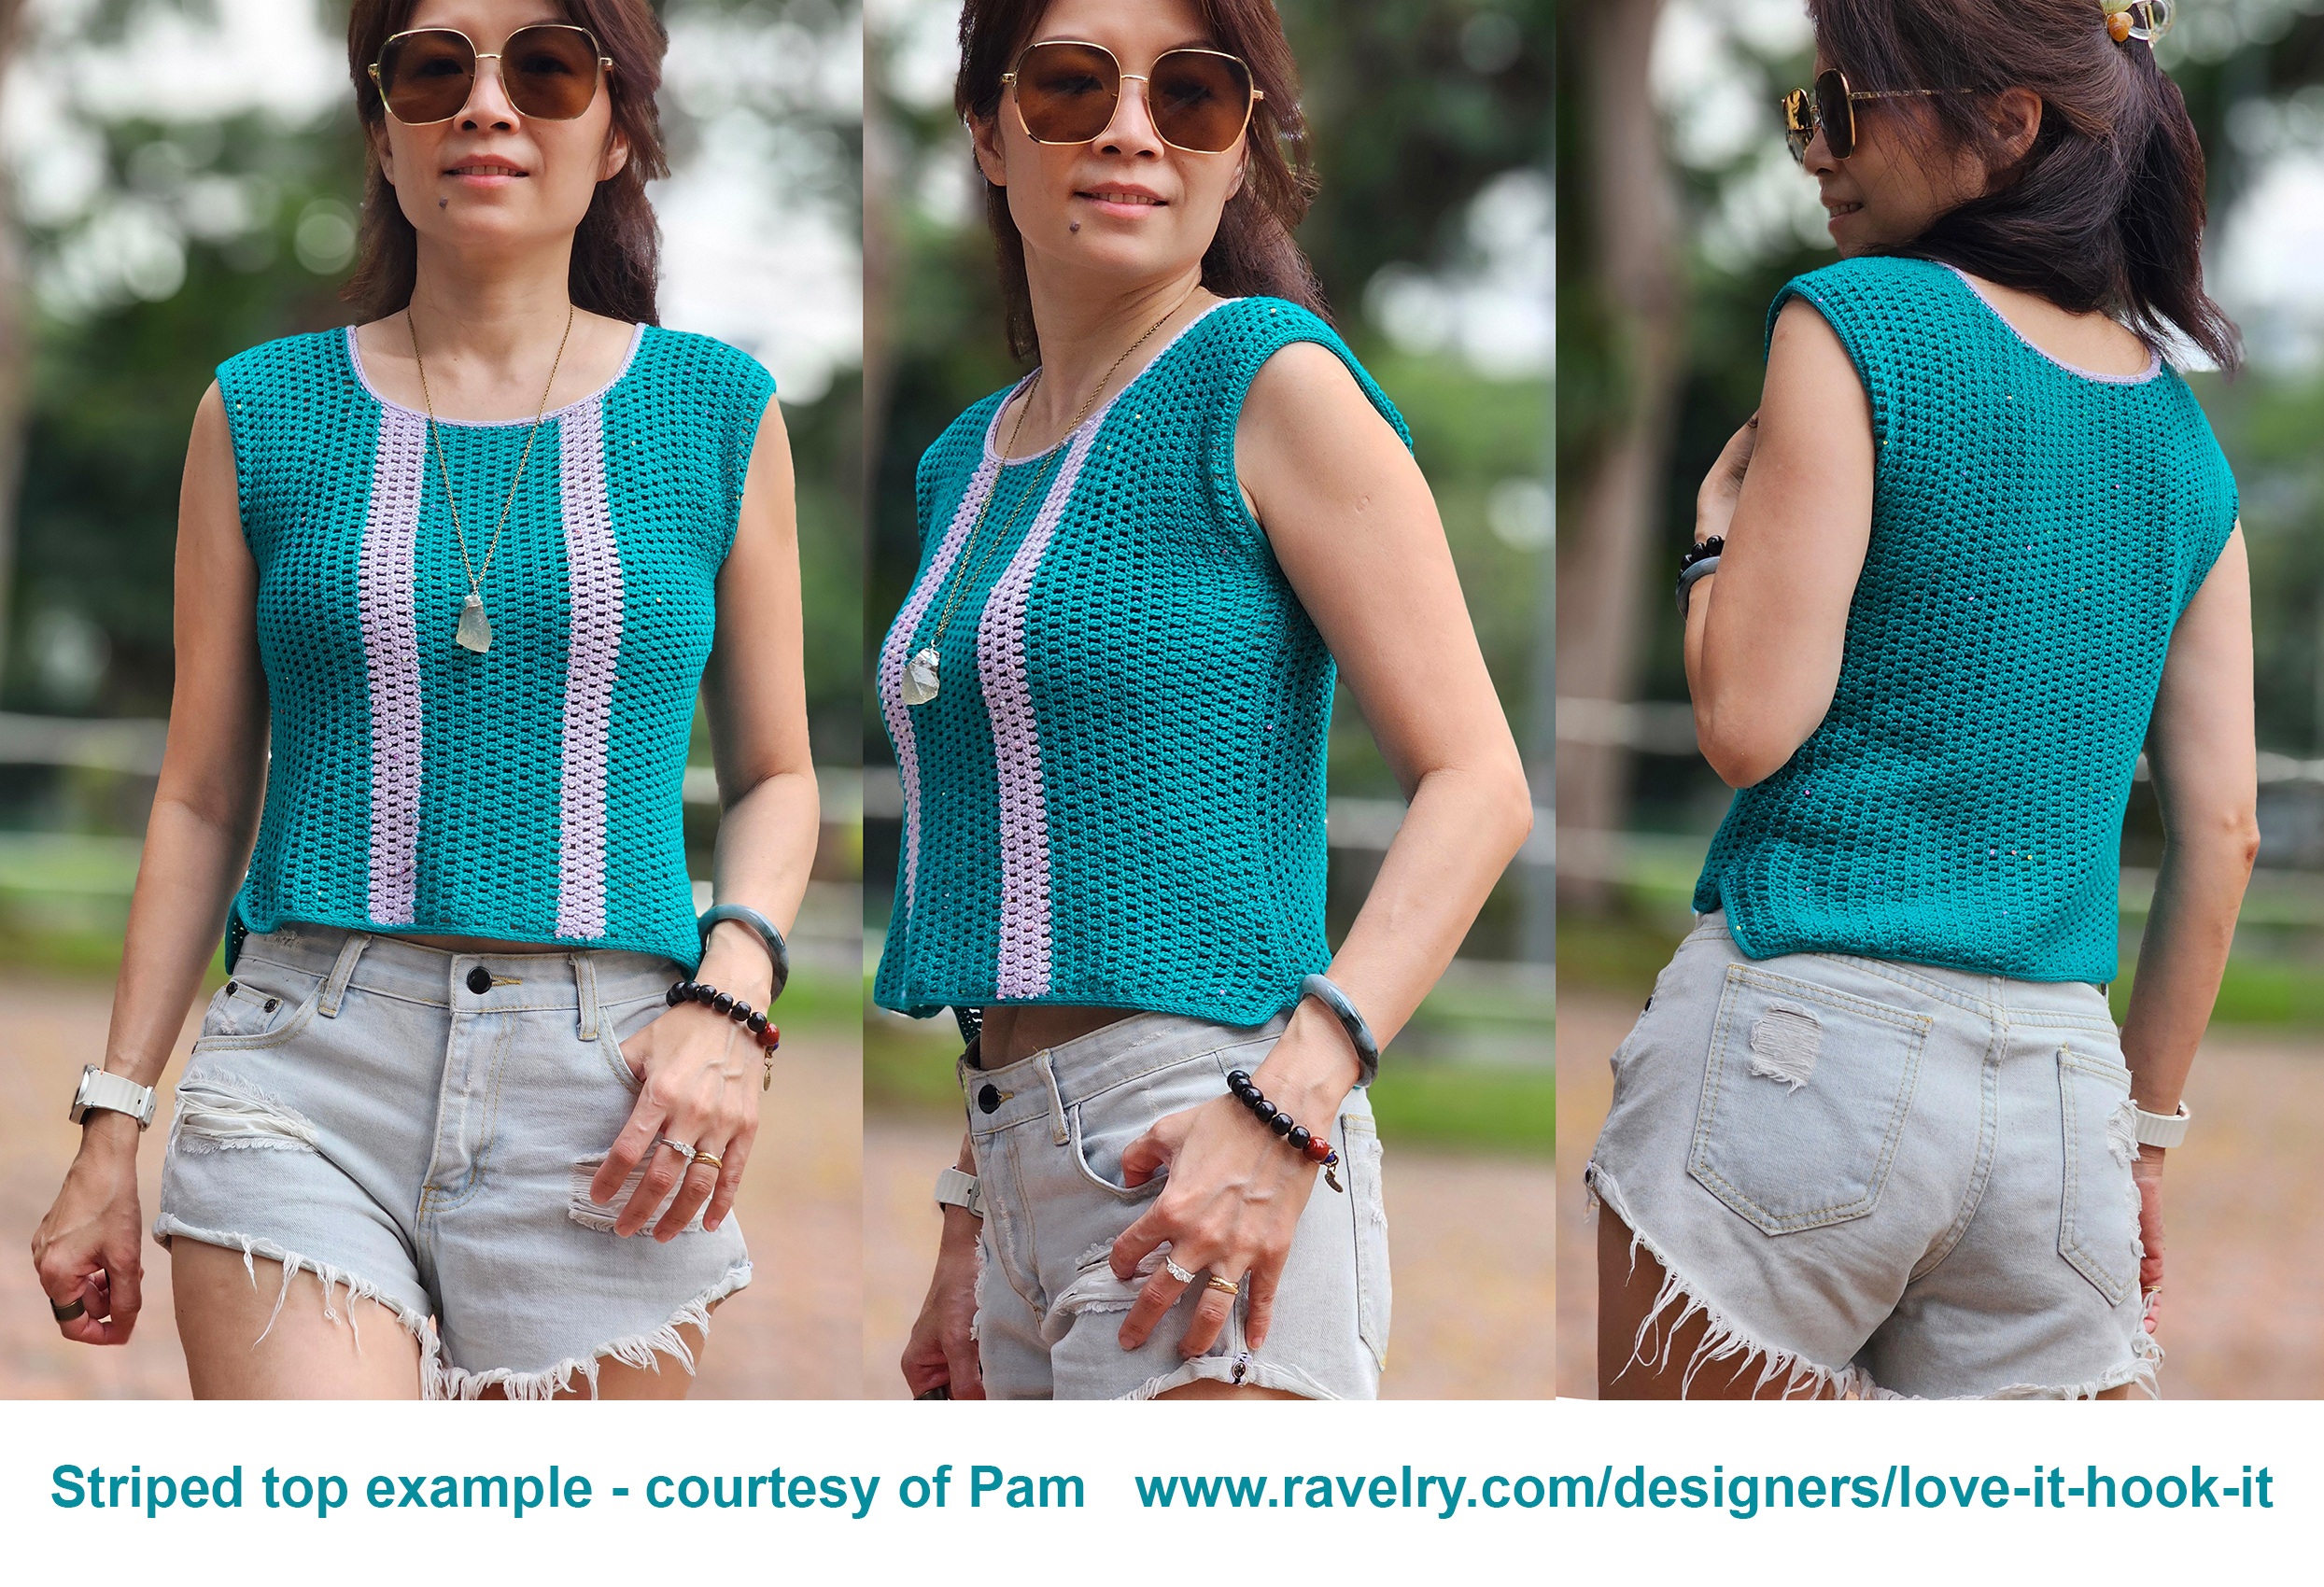
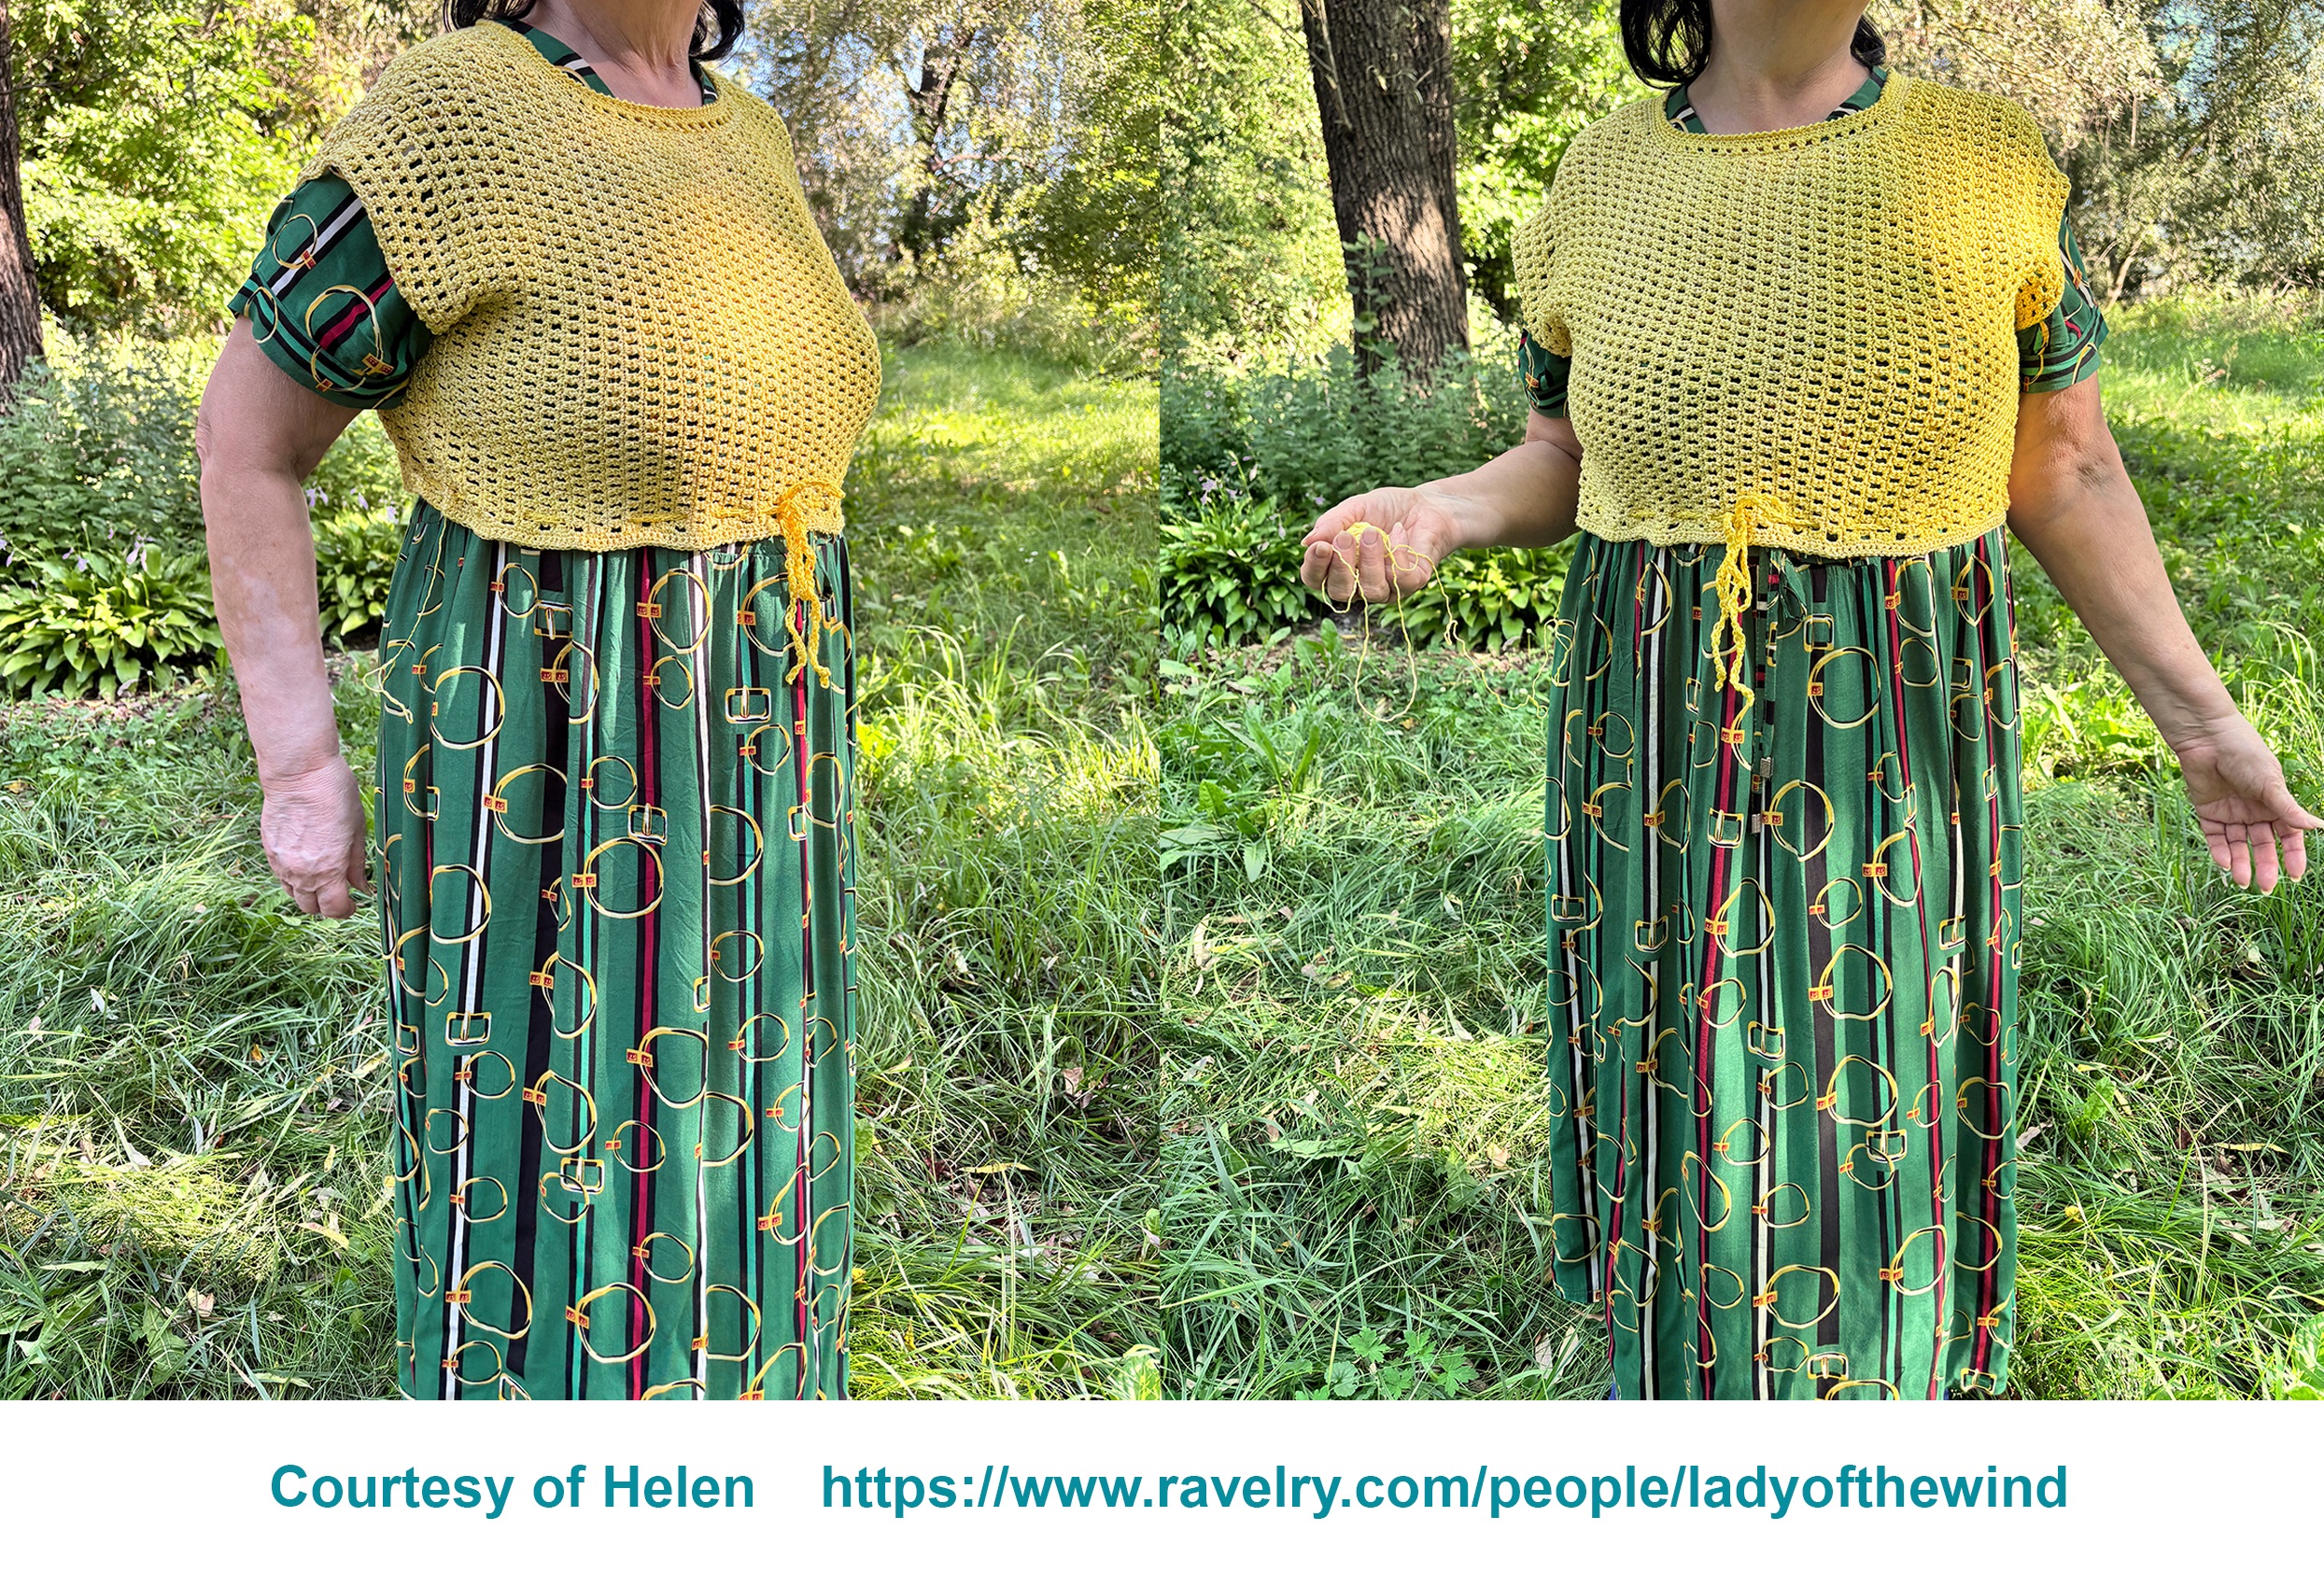
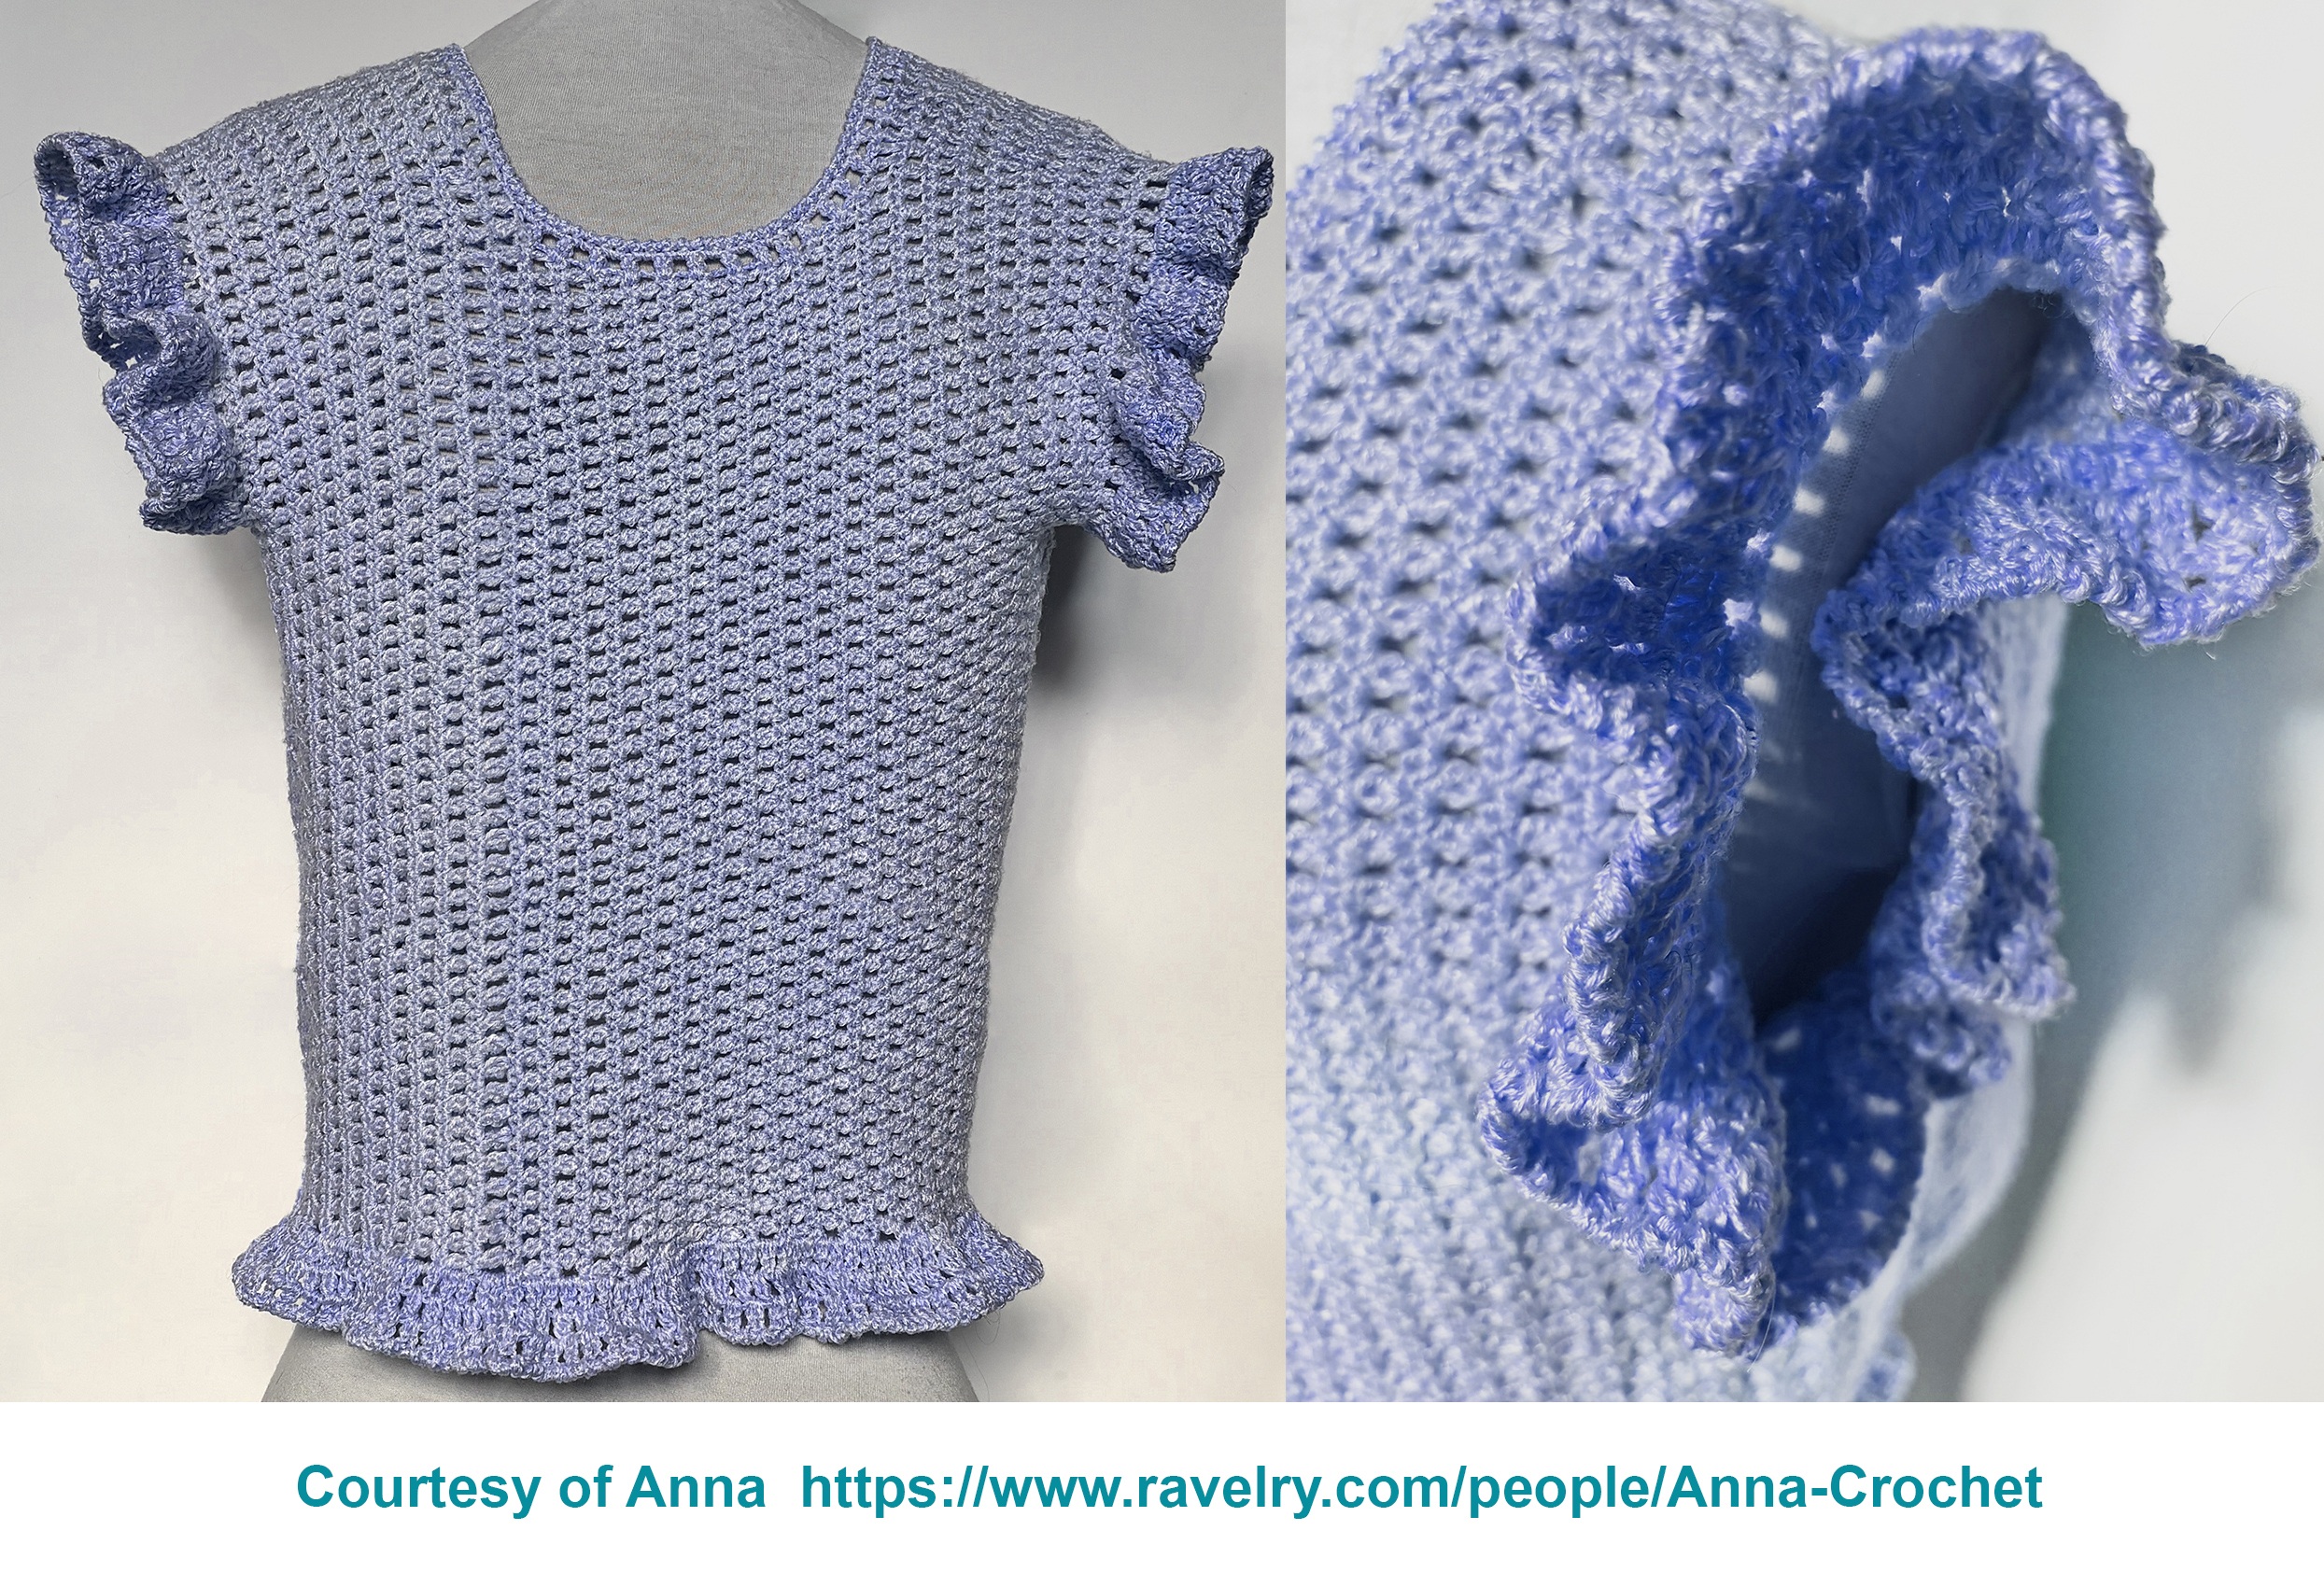
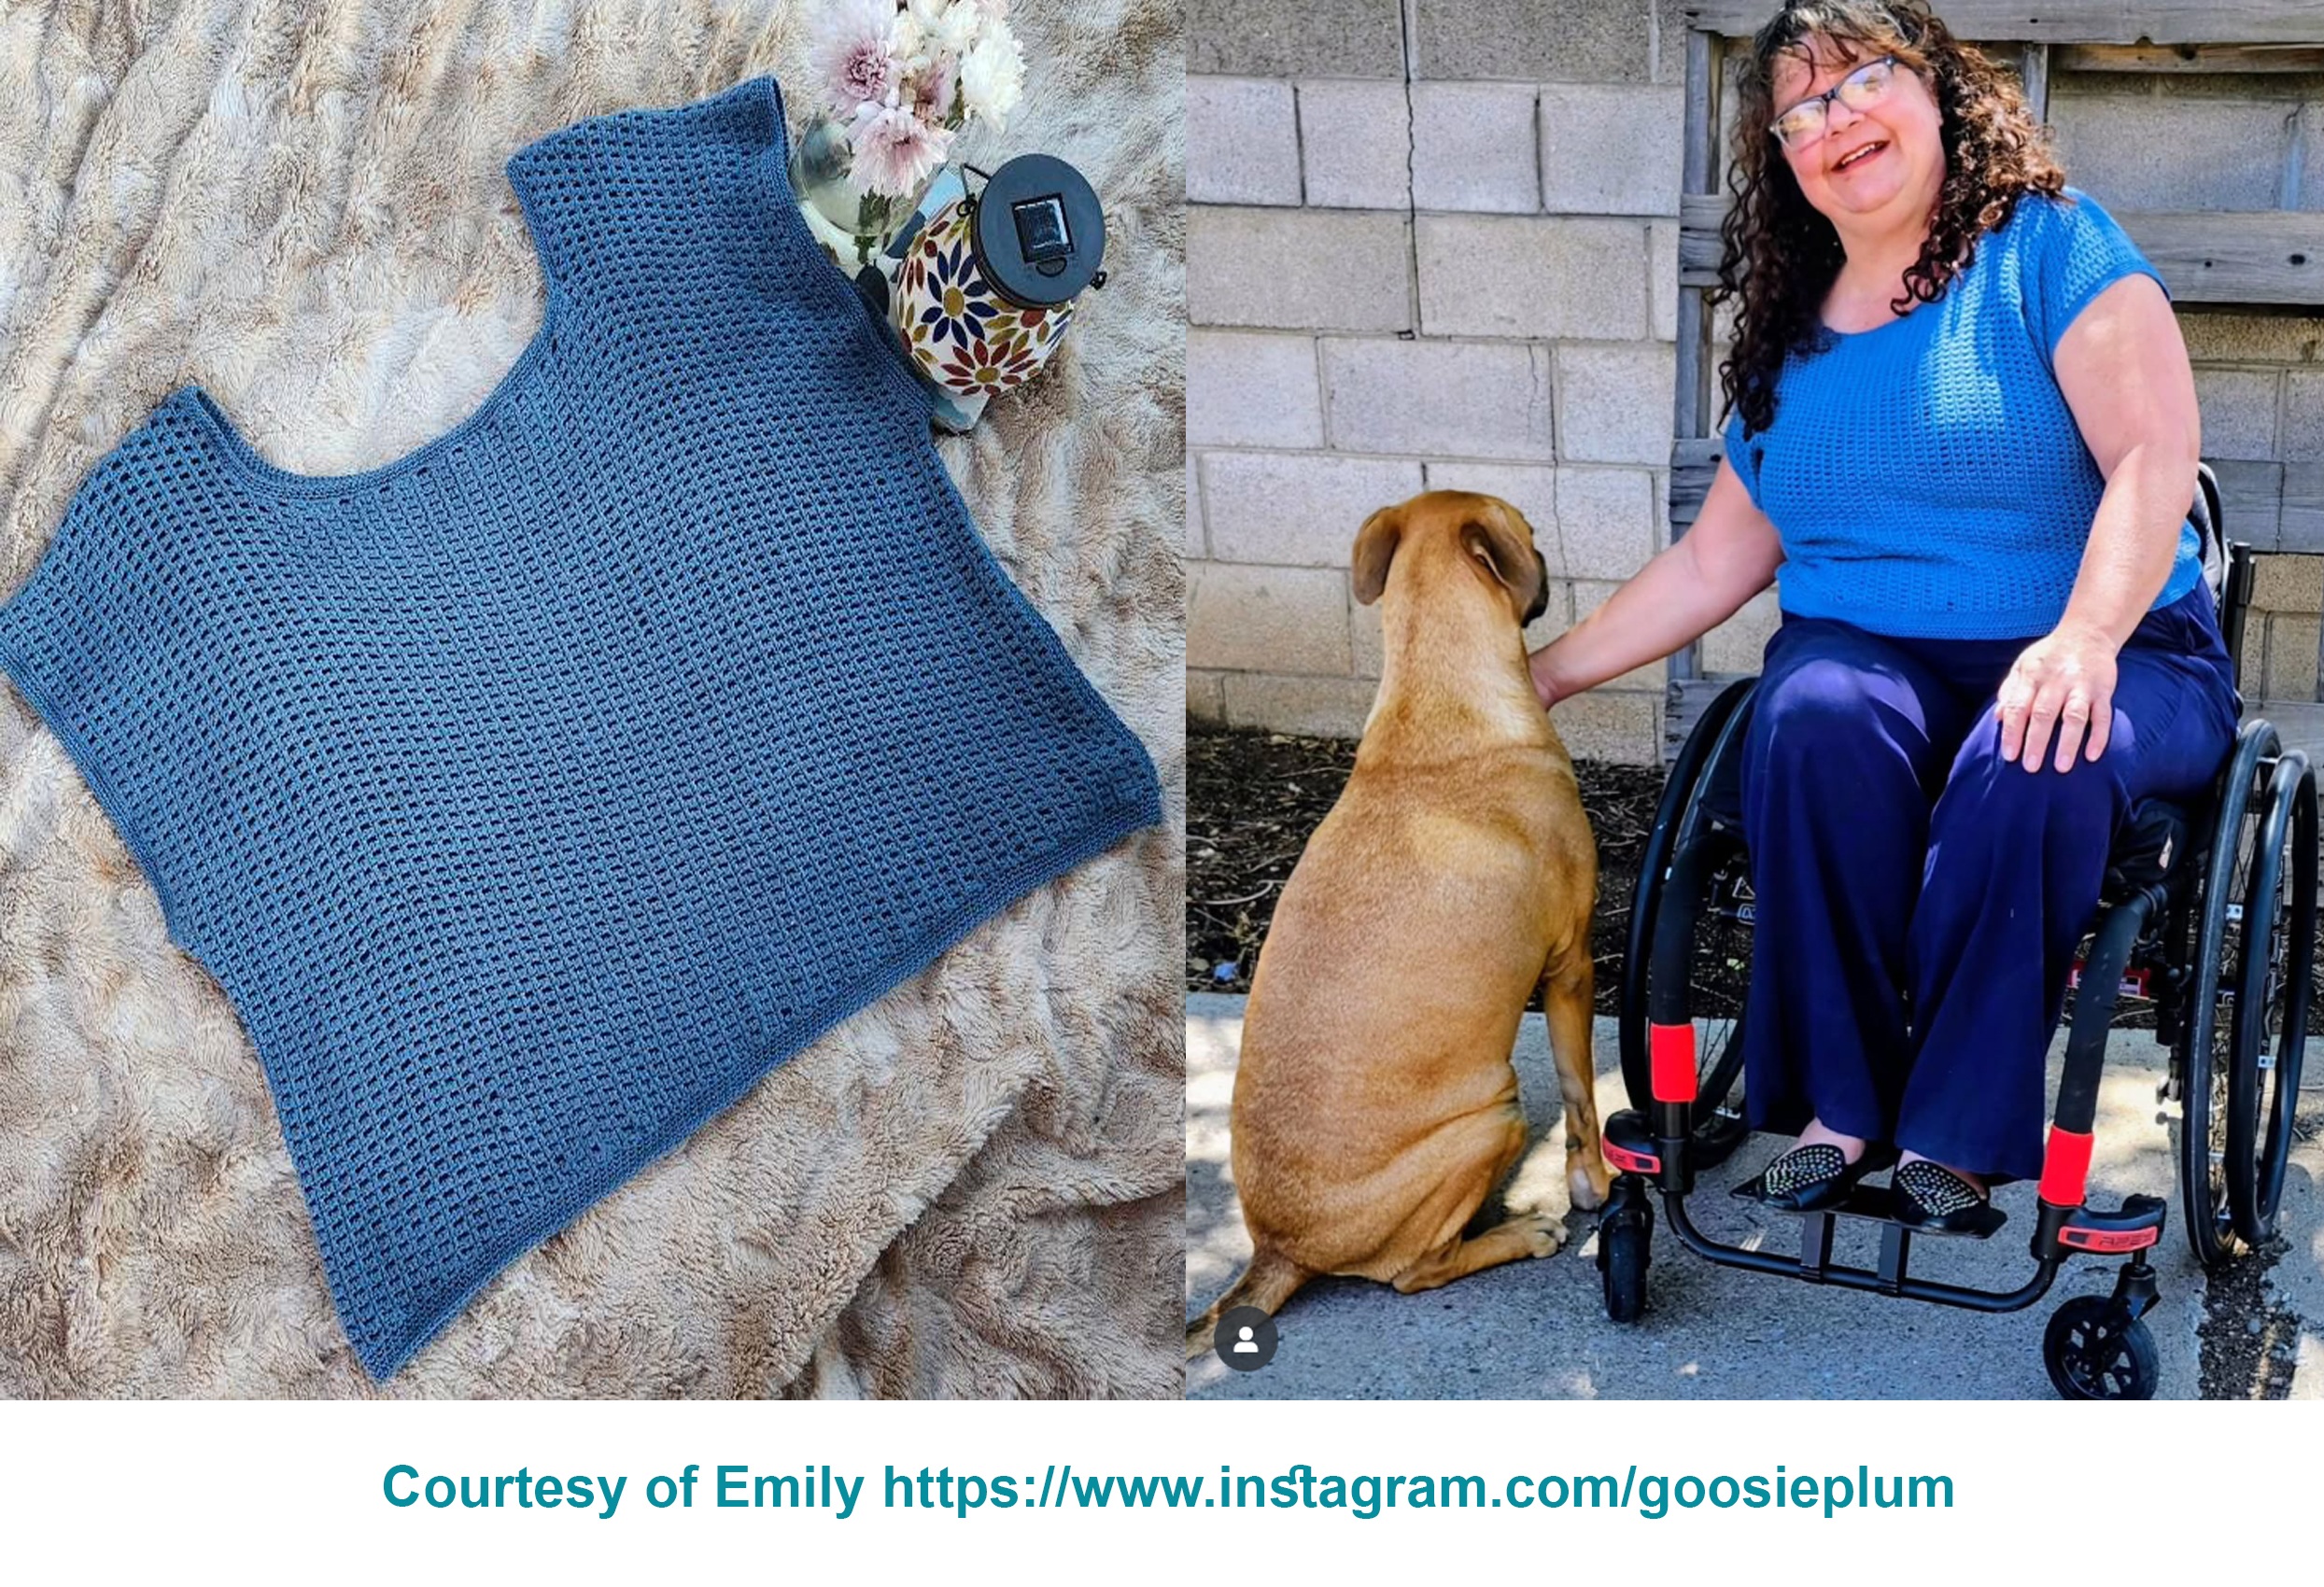
A versatile design that’s as flexible as your creativity! Created with the help of wonderful crochet testers Pam, Emily, Jasmin, Helen, Cedrine and Anna! Whether you prefer a gauge-based version or made-to-measure instructions, this top has you covered in sizes from XS to 4XL.
This stylish top has no shoulder seams and can be created in any length you like. You will crochet it in one piece from one side to neckline, then create the neck opening, rejoin stitches at the shoulder and work body in one piece again from the neckline to another side. Then you can either sew side seams using your preferred sewing method or insert tie strings or ribbons through the openings between the stitches along the sides and avoid sewing.
Create a stylish, customized top that’s truly your own:
► The pattern on 11 pages is written for gauge based and made to measure top.
► Includes charted + written instructions plus links to helpful videos with all stitches and techniques.
► Works beautifully with thin rayon, bamboo, wool, cotton – or even with yarn leftovers for a unique twist.
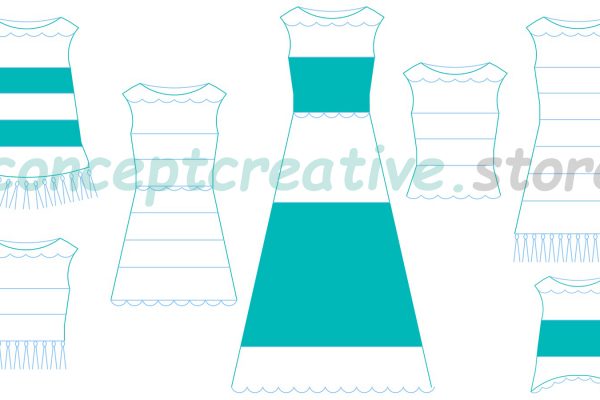
► Make it any length you like – from cropped to tunic.
► Even in easy crochet patterns, the knowledge of basic crochet stitches is required for best results.
And best of all, the WRITTEN PATTERN will remain FREE on this page for all crafters who wish to crochet and share photos of their progress on Ravelry: www.ravelry.com/patterns/library/not-nostalgic-top Please scroll down to the FREE written pattern.
With many people deleting their social media accounts, it’s easier to find finished projects on Ravelry. Unfortunately, finding them using the hashtag #notnostalgictop on Instagram has become harder – since 2025 Instagram has been showing a lot of other posts that just mention the word ‘nostalgic’ instead of only showing posts with the specific tag. Nevertheless, if you are still on social media, I’ll be happy if you show your Not NOSTALGIC top to your friends and send them the link to this pattern. But please don’t share the pattern :), thank you!
Here are the finished projects created from this crochet pattern:

GOT your yarn and hook? Start crocheting this top crochet pattern NOW! Or add to your RAVELRY queue:
www.ravelry.com/patterns/library/not-nostalgic-top
www.ravelry.com/designers/conceptcreativestore
The Not NOSTALGIC Top pattern is size Inclusive – it is written for eight sizes. Here are yarn requirements for the length 46 cm = 18’’ from shoulder to hem for gauge based version:
XS with bust 71-77 cm (28-30.5’’) – take 900m = 985yds;
S with bust 81-85 cm 32-33.5’’ – take 990m = 1085yds;
M with bust 89-95 cm 35-37.5’’ – take 1100m = 1200yds;
L with bust 102-107 cm – 40-42’’ take 1250m = 1370yds;
XL with bust 111-116 cm 44-45.5’’ – take 1350m = 1475yds;
2XL with bust 120-125 cm 47-49’’ – take 1450m = 1585yds;
3XL with bust 132-137 cm 52-54’’ – take 1590m = 1740yds;
4XL with bust 140-146 cm 55-57.5’’ – take 1700m = 1860yds.

The featured black crochet top was made with thin cotton thread and hook 2 mm. If you aim to have the same stitch definition, use cotton thread sizes 5, 8 or 10 in USA or 3 ply in UK, AU, for example: www.ravelry.com/yarns/library/puppets-eldorado-10 and gauge 24 double crochets by 14 rows in 10 x 10 cm = 4’’x4’’ (in American crochet terms):
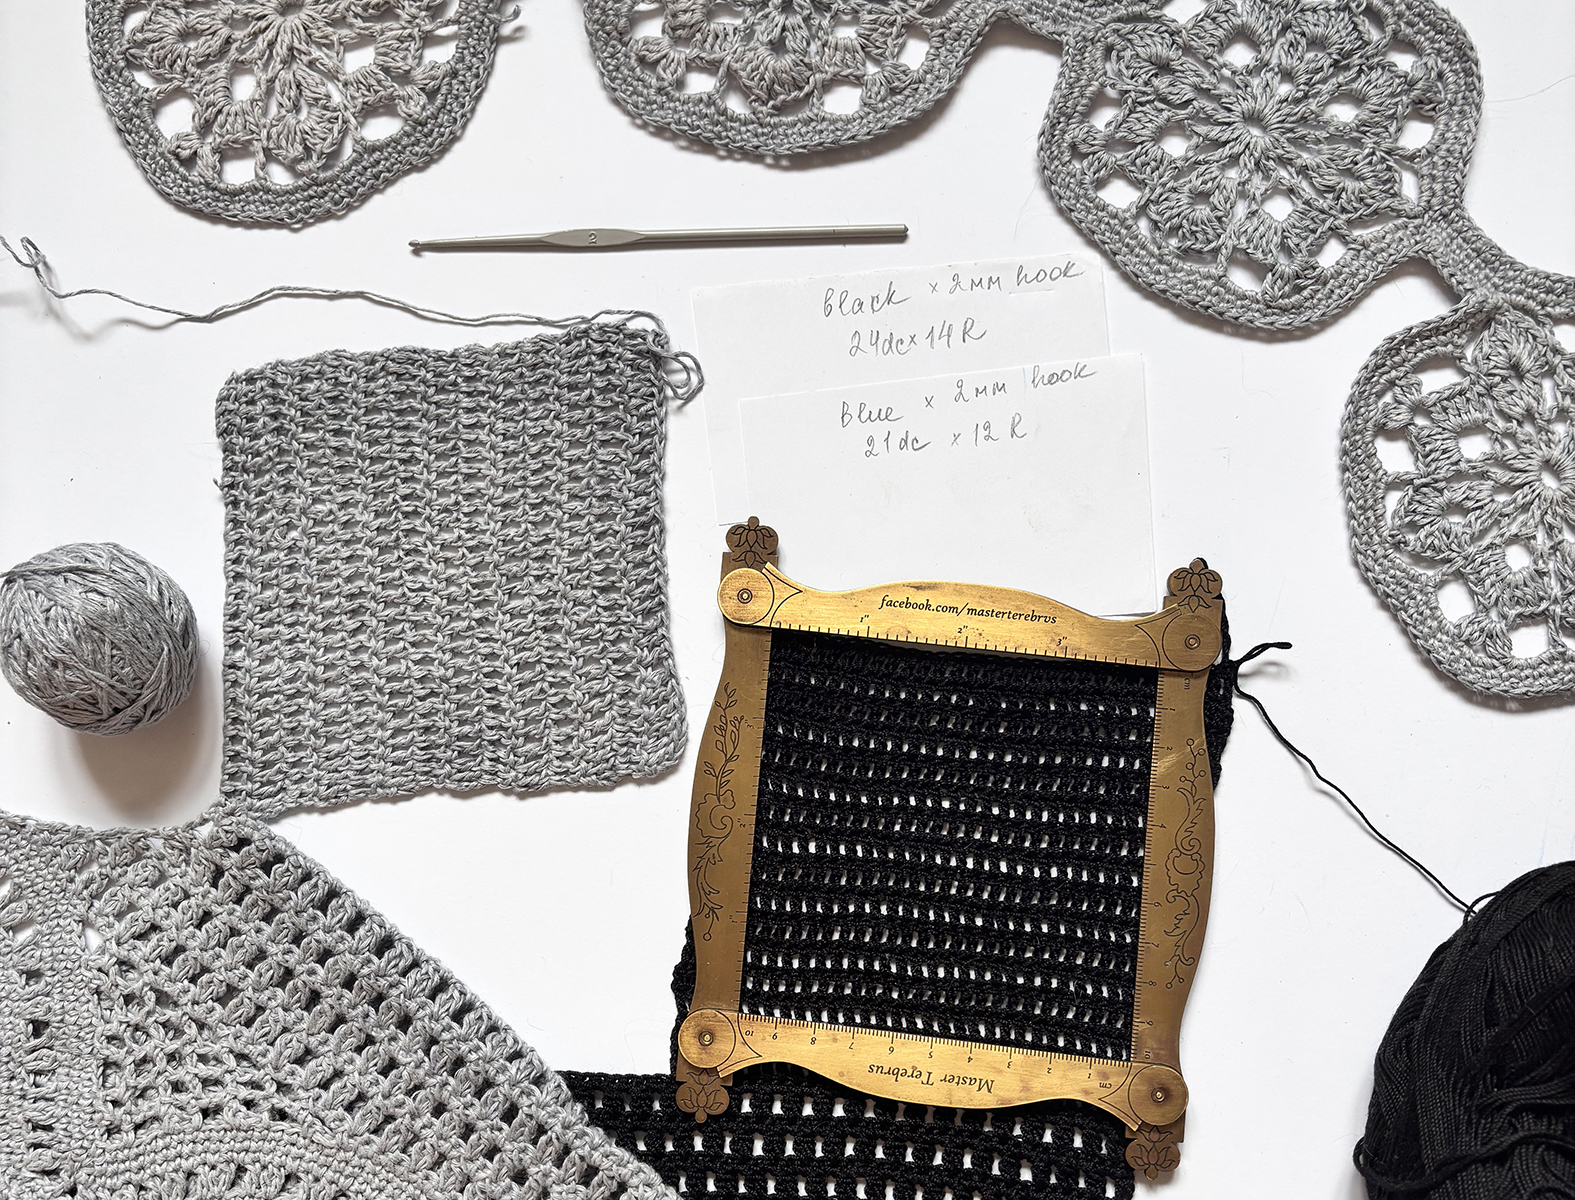
You do not need to buy this foldable gauge-frame – just use any measuring tape or another gauge-frame :), but since lots of crocheters ask where to get it, I’ll answer here. That was my Christmas present a while ago! 🙂 One of my friends creates beautiful ancient instruments (astrolabes, quadrants etc.) – beautiful pieces of art now (and useful medieval instruments then). You could see his products on www.etsy.com/shop/MasterTerebrus/sold and Facebook: www.facebook.com/masterterebrvs
On this blog we will crochet the Made to Measure version of this top in any length for sizes XS-4XL. We will follow written instructions with some helpful photos. Please scroll down to the Made to Measure pattern.
What is included into PAID PATTERN conceptcreativestore.etsy.com/listing/157352851 :
► Written row-by-row description with photos of stitches;
► Links for 2 VIDEOS that show how to crochet all stitches and rows;
► Colourful CHARTS that allow you to see all crochet stitches at once. With this pattern you can learn reading charts by following written instructions and videos and comparing how these stitches look like in diagrams.
► Instructions for gauge based and made to measure top with automatic calculation tool and schematic with measurements.
All of that should be sufficient for your successful completion of this top, even if you are a beginner who knows how to work the basic crochet stitches and how to follow crochet patterns. Also available on my website: https://conceptcreative.store/shop/not-nostalgic-top
CROCHET TOP PATTERN – Made to Measure version:
I suggest browsing this page on your computer or tablet because all photos on your mobile phone will look too small.
Copyright © 2025 All rights reserved. Any reprinting, transmitting, reproducing, publishing or otherwise using for commercial purposes parts of this description is strictly prohibited without my prior written permission. Feel FREE to sell your finished top(s), give them as presents and publish your result on https://mycrochet.conceptcreative.store
Materials needed:
Use the hook size recommended on your yarn label, or a hook that gives you the most interesting stitch definition. The larger your hook and the thicker your yarn, the larger will be the openings between the stitches.
Yarn: aside from crochet thread, you can use bamboo, rayon, cotton or linen blends in Fingering or Light Fingering weight with the length 400-450m/100 gr, such as:
www.ravelry.com/yarns/library/scheepjes-whirlette
www.ravelry.com/yarns/library/scheepjes-whirl
www.ravelry.com/yarns/library/yarnart-flowers
Or wool, wool/acrylic blends in Light Fingering weight with the length 500-620m/100 gr, for example: www.ravelry.com/yarns/library/loops–threads-woolike
Choosing the right YARN and HOOK to achieve great results
TEST whether you will enjoy wearing your summer torso garment (tunic, top or dress) that will be made with your yarn during the summer heat: Take your yarn outside during the temperature you would be wearing your torso garment; try to crochet/knit with it without air conditioning. Check the time ⌛ needed for your hands to get sweaty. That’s approx. time you will feel fine in that garment when you are moving in it outside during the same temperature. Yes, you can use any fiber if you are creating tops for taking photos for Instagram in an air-conditioned room – it will be fine to knit or crochet with almost anything, even bras with bulky weight wool or acrylic :).
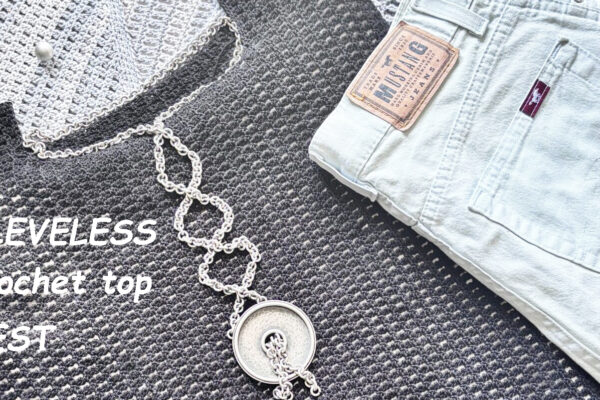
Optional embellishments on black top: Shank buttons with the diameter 0.8 cm = 0.3’’ (7 black and 14 bronze buttons in top shown below); ribbons for lacing each side (0.5 cm = 0.2’’ wide, 1.5 m = 1.6 yds long were used to lace each side in the size M). 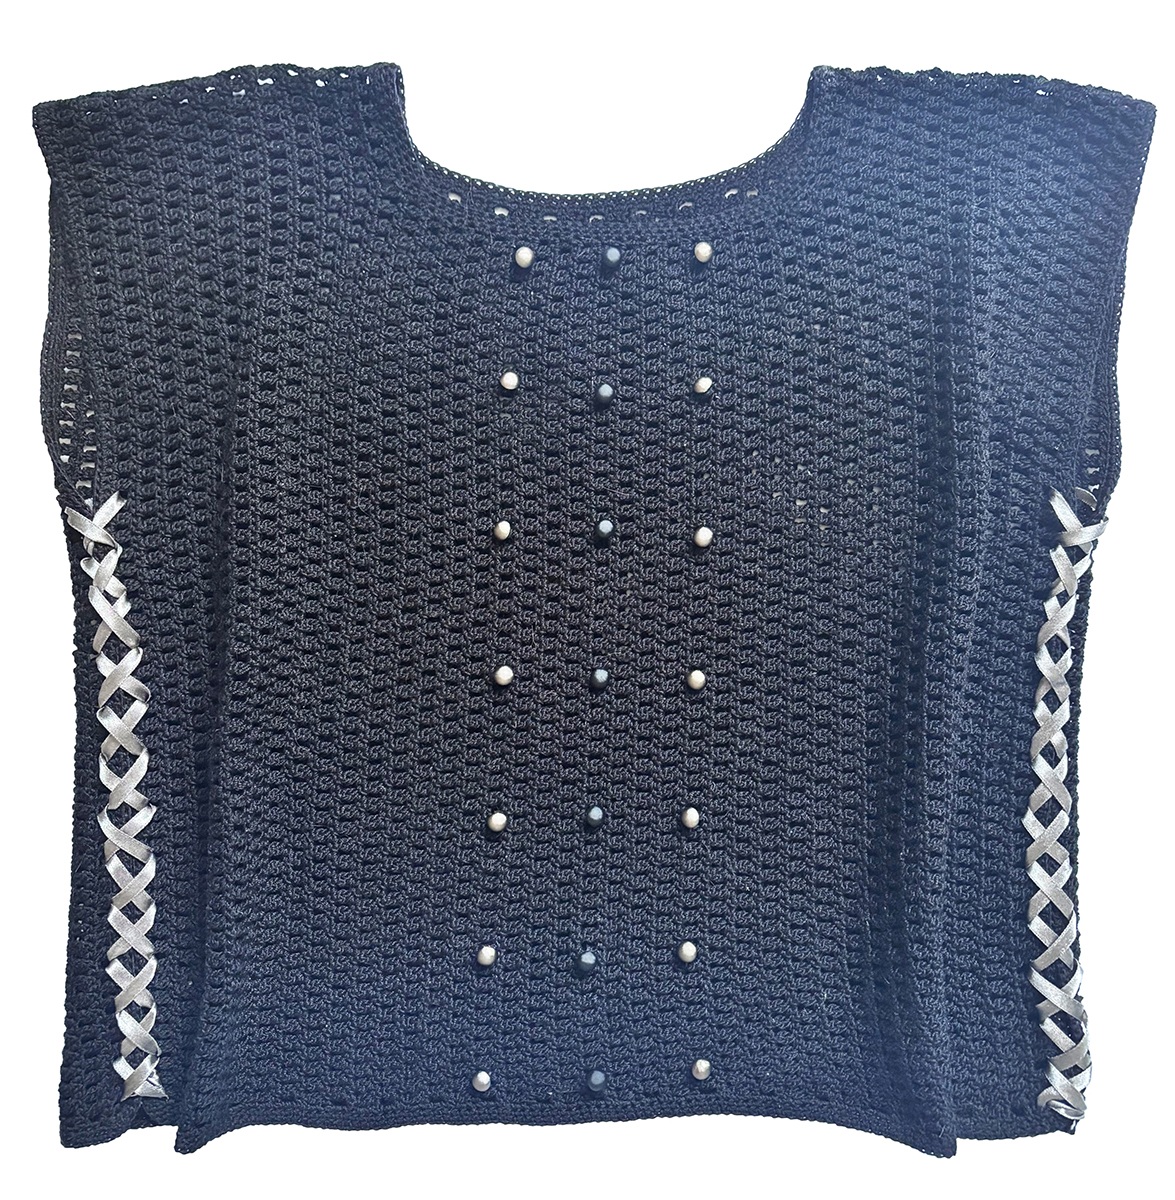
The sample shown doesn’t require an undershirt, as the openings between stitches are small enough to provide coverage, making this top comfortable for hot weather. However, a bra or silicone adhesive transparent bra is recommended for additional coverage of your nipples.
The width of your finished top will be:
|
Size |
XS | S | M | L | XL | 2XL | 3XL |
4XL |
|
Fits bust circumference |
71-77cm
28-30.5’’ |
81-85cm
32-33.5’’ |
89-95cm
35-37.5’’ |
102-107cm
40-42’’ |
111-116cm
44-45.5’’ |
120-125cm
47-49’’ |
132-137cm
52-54’’ |
140-146cm 55-57.5’’ |
| Width of Front Width of Back | 37.4cm
14.7’’ |
41.7cm
16.4’’ |
46cm
18.1’’ |
52.4cm
20.6’’ |
56.7cm
22.3’’ |
61cm
24’’ |
67.4cm
26.5’’ |
71.7cm 28.2’’ |
Abbreviations in American crochet terms:
sc – single crochet,
hdc – half double crochet,
dc – double crochet,
st(s) – stitch (es),
ch – chain (s),
beg – beginning,
R. – round or row,
rep – repeat,
prev – previous,
yo – yarn over,
* – repeat sts from * to *.
Special stitches:
cluster – several incomplete dc joined together at the top and worked either in the same st or in different sts www.redheart.com/learn/articles/how-crochet-clusters
t ch – turning chain (s) www.lionbrand.com/pages/how-to-crochet-turning-chain When you begin a R. of any st, you will start with a chain that is the same height as sts in the R. you are working. In rows with clusters t ch and ch between clusters are not included into st-count – only clusters will be counted. 1st ch doesn’t count as the 1st st in all rows with sc.
fsc = single crochet foundation: 2 ch, insert hook in 1st ch, *yo, pull up a loop (= 2 loops on hook), yo, pull through 1st loop (= 2 loops on hook), yo, pull through both loops* = 1st fsc made; rep from * to * for each next fsc working into the bottom of prev. st.

2-dc-cluster in 1 st = dc2together = 2 double crochets joined at the top: *yo, insert hook in 1 st, yo, pull up a loop, yo, draw through 2 loops* (=2 loops on hook), rep from * to * in the same st, yo, draw through all 3 loops.
Notes:
- This crochet pattern is written in American crochet terms.
- Both sides of this top are equally attractive – you can choose which side to be the visible (right) side.
- The top has no shoulder seams and is worked in one piece from side to side. The foundation row should be twice the length of your desired finished top length. Crochet front and back in one piece from the side toward the neckline, then work them separately to create the neck opening, rejoin front and back at the shoulder and work them in one piece again from the neckline toward the side.
- You can either sew side seams using your preferred sewing method or insert tie strings or ribbons through the openings between the stitches along the side edges and avoid sewing. In the latter method, you can follow a smaller size and adjust the fit of your top with ribbons along the sides.
CROCHET TOP:
Start is the same for all sizes, work back and forth, turning after completing last st.
- If you plan to sew side seams after finishing your top, prior to working R.1 leave a piece of yarn for sewing this side seam (1 m = 1 yard for seaming with the mattress stitch). Omit this step if you plan to join sides with tie strings or ribbons.
- Work fsc in R.1 with a hook that is 0.3-0.5 mm smaller than the hook you will use for other rows. If fsc are hard to make, work a foundation chain with a 0.3-0.5 mm larger hook, turn, work 1 sc in each ch with hook you obtained gauge.
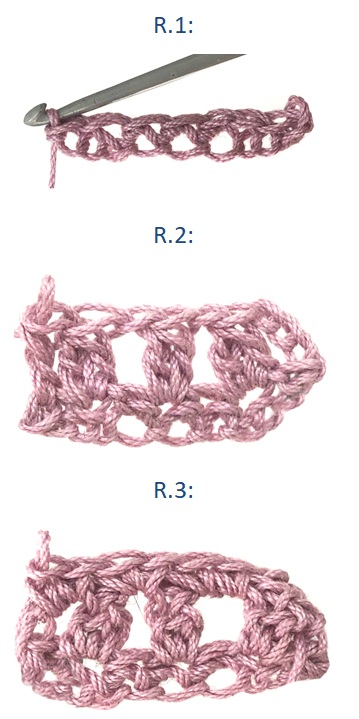
R.1, foundation: for establishing the total length of front and back in all sizes, work fsc until the length of all stitches reaches 91-94 cm = 36’’-37’’ and you have ODD number of fsc. To see how long the top will fall, measure the half of this length against the wearer – from shoulders to bottom. Or work foundation until the length of body is to your liking. For example, your st-count is 239 fsc.
All fsc in R.1 will be regarded as sc in R.2.
our INSTAGRAM

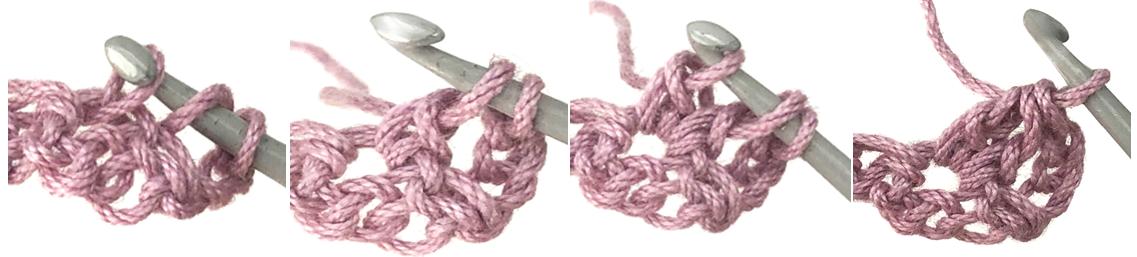
R.2: 3 t ch, *2-dc-cluster in next sc, 1 ch, skip 1 sc*, rep from * to last 2 sc, work last cluster in 2nd to last sc, 1 dc in last sc. You have worked clusters separated by 1 ch; 1 dc in the end, 3 ch in the beg of R). St-count in R.2: subtract 1 from your st-total in prev.R. and then divide this number by 2: (239-1) / 2 = 119 clusters.
R.3 (skip clusters): 1 ch, 2 sc in each 1 ch, 2 sc in t ch after last cluster. Clusters in all rows are placed on a diagonal throughout. St-count in R.3: multiply the number of clusters in prev.R. by 2 to get the number of sc: 119*2 = 238 clusters.
R.4: 2 t ch, 1 dc in 1st sc, *1 ch, skip 1 sc, work 2-dc-cluster in next sc*, rep from * to last 2 sc, work last cluster in 2nd to last sc, 1 ch, 1 dc in last ch. St-count in R.4: subtract 2 from your st-total in prev.R. and divide by 2: (238 -2) / 2 = 118 clusters.
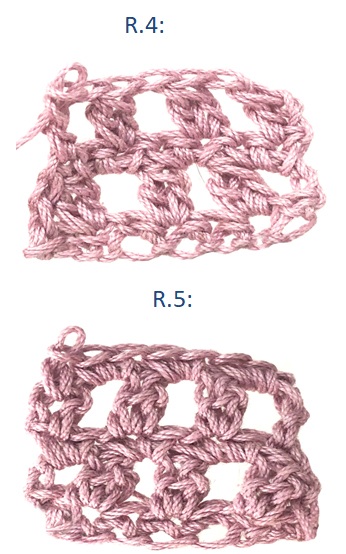
R.5 (skip clusters): 1 ch, 2 sc in each 1 ch, 1 sc in last dc. It doesn’t matter where you place the last sc – in last dc or last t ch as long as you fix the end of R. with 1 sc. St-count in R.5 should be as the number of fsc in R.1.
Rep R.2-5 until the total length of your rows reaches the width of one shoulder:
|
Size |
XS | S | M | L | XL | 2XL | 3XL |
4XL |
|
Width of Shoulder |
10.8cm
4.25’’ |
10.8cm
4.25’’ |
13cm
5.1’’ |
15.2cm
6’’ |
17.3cm
6.8’’ |
19.5cm
7.7’’ |
21.7cm
8.5’’ |
23.8cm 9.4’’ |
Make sure you have worked an EVEN number of rows with clusters – add or omit a row if necessary.
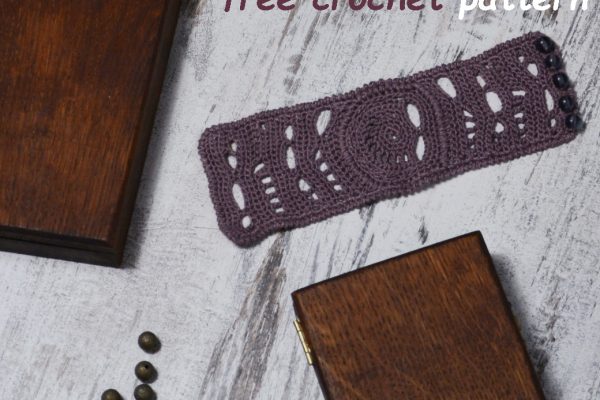
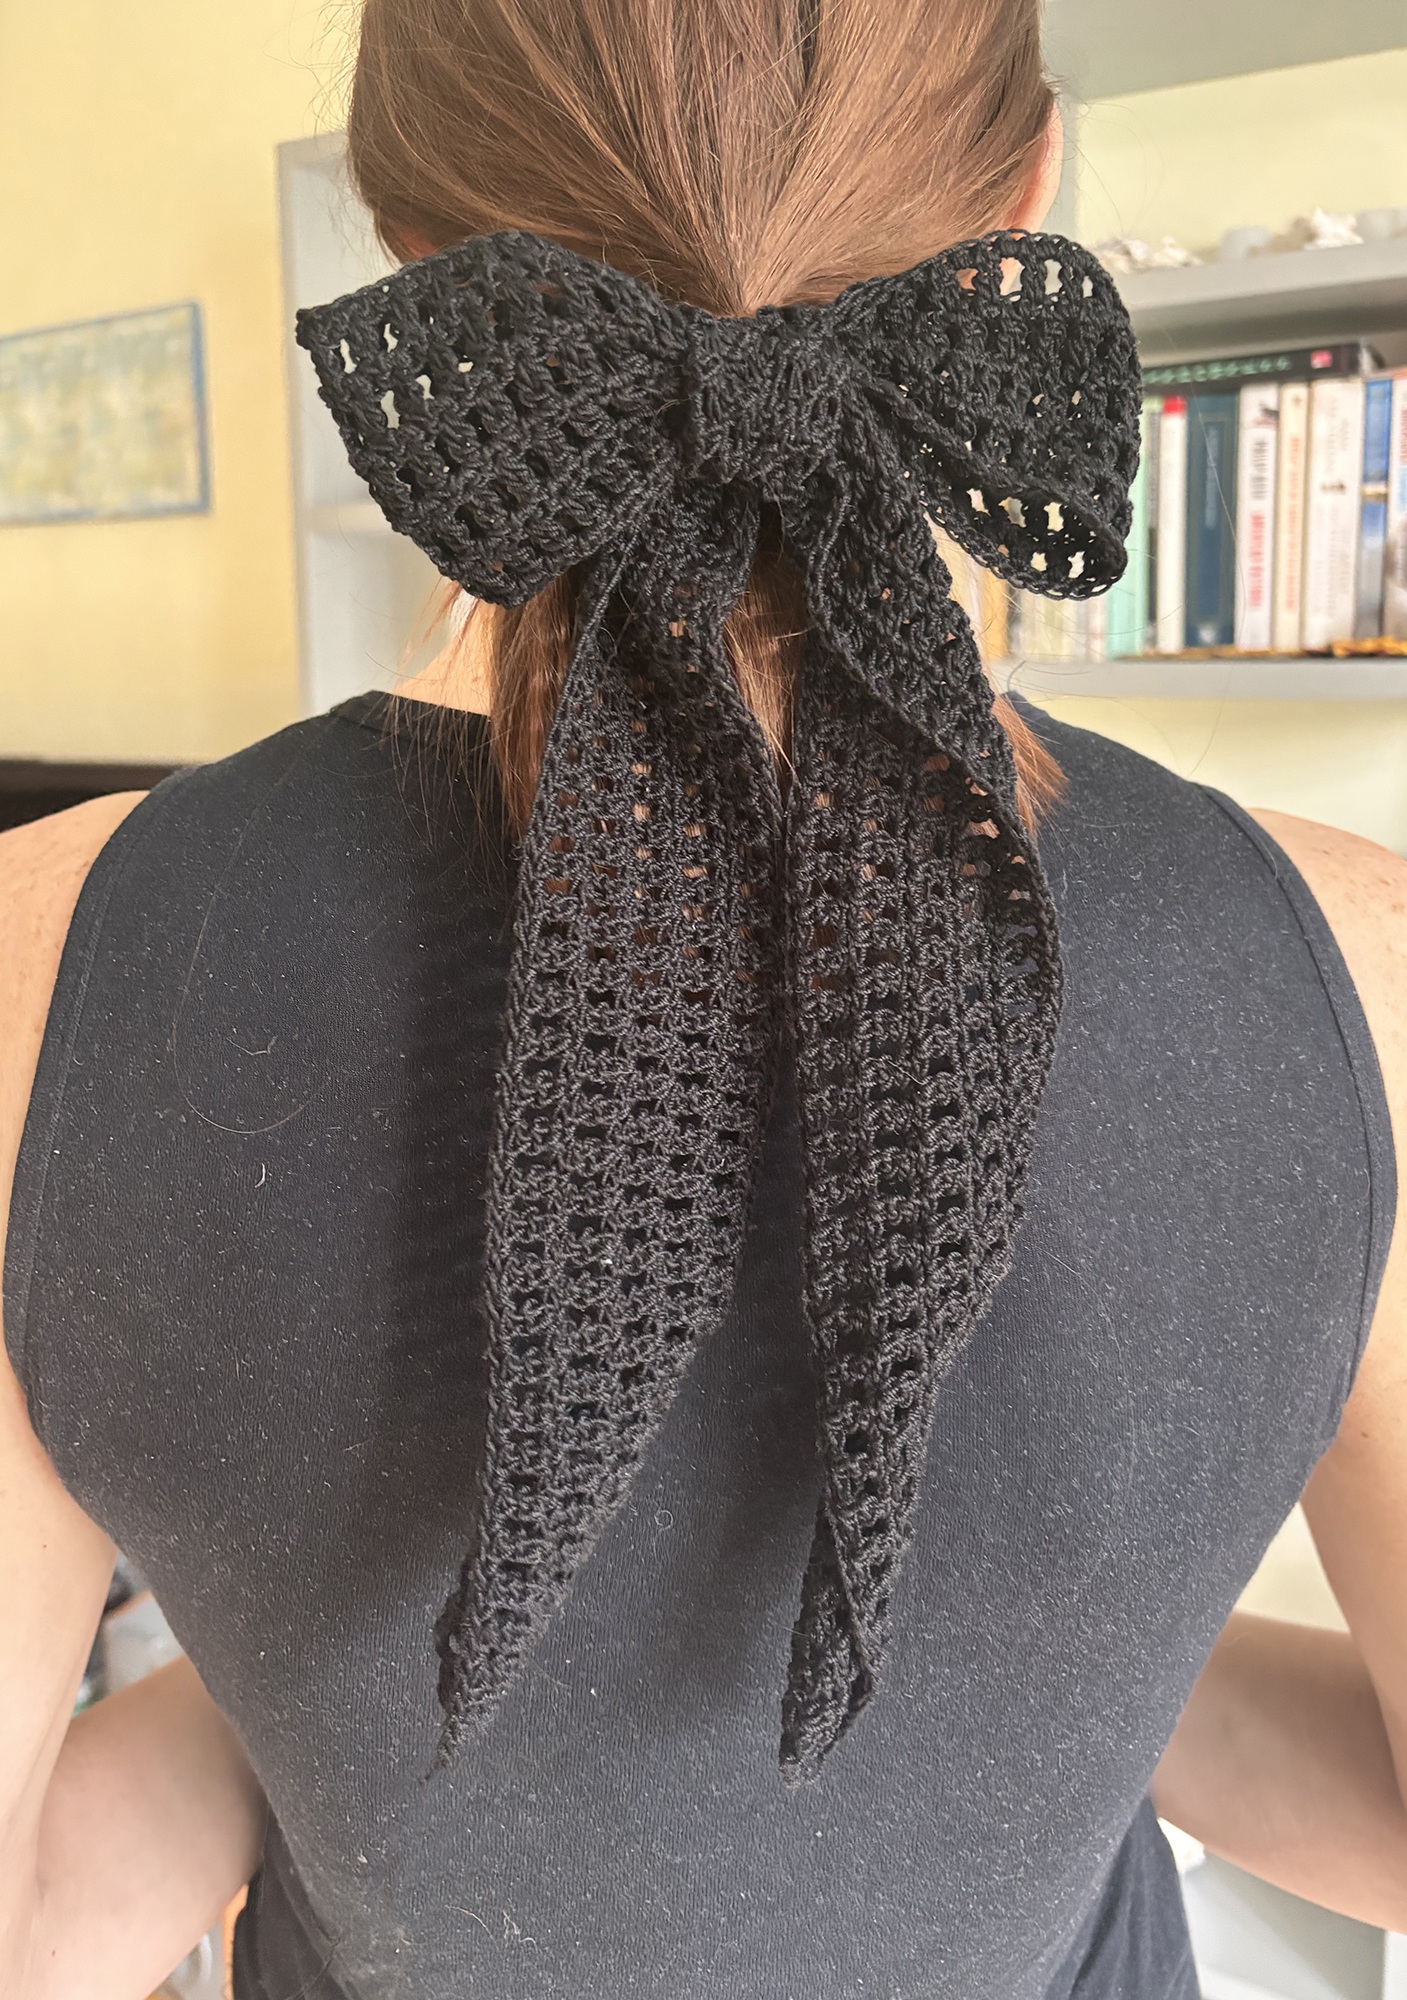
By the way, you can wear your current piece as a bow:
Please upload photos of your work to Ravelry linking to this pattern www.ravelry.com/patterns/library/not-nostalgic-top to continue crocheting this top. As soon as you send me the link to your current WIP on Ravelry, I will direct you to the next part of this pattern, which is the separation of front and back and all rows that will be close to your neckline.

Thank you! Hope you love making and wearing this crochet top!