*******
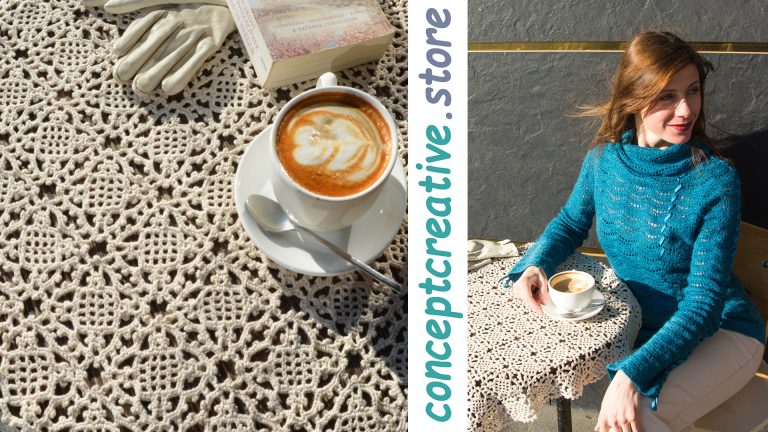
Crocheting these beautiful motifs for relaxation will have a truly magical effect on your brain – soothing and almost hypnotic. On one hand, the completed tablecloth will give an atmosphere of calm and serenity to your interior, on the other hand, this will be a heirloom that will be passed down to your children.
- An incantation is a magical formula intended to trigger an effect on a person or objects. The formula can be spoken, sung, chanted. Or crocheted! ?
- In the world of magic, the incantations are said to be performed by wizards, witches and fairies. The incantation performed can bring up powerful emotions and remind one of a sense of awe. Another potential source of such a power is its exclusivity!
Scroll down to my free photo tutorial and charts for making such square motifs, which are joined together as you go. Printable PDF version with all charts and photos (without watermarks) is available for a small fee in my shop – please press on this link conceptcreative.store/whats-more
This paid printable PDF also contains an additional photo tutorial on how to make such crochet squares without breaking the yarn – my usual formula on making any motif-project without ruining the beautiful yarn and hiding all ends. I admit that whenever I see a crochet item that I’m not going to use anymore and the yarn is too expensive to give this project as a present – I reclaim the yarn and make something new with it. So, it you will ever need to undo several of such squares – it can be done easily. Scroll down to see how I frogged some of them ?.

Copyright © 2019 All rights reserved.
Any reprinting, transmitting, reproducing, publishing or otherwise using for commercial purposes parts of this tutorial and photos is strictly prohibited without my prior written permission. You may give this link to promote this free crochet pattern: https://conceptcreative.club.gothicus.metanet.ch/2019/03/15/incantation-free-crochet-pattern/ (please press on it).
Only your completed crochet work belongs to you – feel free to sell it, give as a gift as many times as you wish. Feel free to share photos of your finished projects here: http://mycrochet.conceptcreative.store/ or add to your Ravelry list: www.ravelry.com/patterns/library/incantation-tablecloth (just press on this link).
Materials:
Yarn: 100 % cotton or linen, loosely woven, approx. 340-400 m per 100 gr (372-437 yards per 3.5 oz). It equals to 4 ply (UK), Fingering (USA), 1 or Superfine, for example:
www.ravelry.com/yarns/library/lang-yarns-baby-cotton-fingering
www.ravelry.com/yarns/library/katia-panama
www.ravelry.com/yarns/library/rowan-summerlite-4ply
www.ravelry.com/yarns/library/bernetta-wolle-baby-soft
www.ravelry.com/yarns/library/sandnes-garn-mandarin-petit
www.ravelry.com/yarns/library/omega-eulali
www.ravelry.com/yarns/library/scheepjes-cotton-8
In USA it is possible to use Aunt Lydia’s Fashion Crochet Size 3 (though the stitches will look a bit thinner).
The sample shown consists of 72 square motifs joined together as you go. One square motif of size 7.5 x 7.5 cm (3 x 3’’) requires 10 meters (11 yards) of cotton. For the mentioned size take 720 meters (787 yards).
The length and width of the tablecloth can be adjusted as desired by adding more (omitting some) square motifs.
Hook: 2 mm or hook suggested for your yarn.
The size of square motif is regarded as gauge in this pattern. With different yarn, hook and tension you will have different size of these square motifs; your yarn usage will vary as well.
Abbreviations in American crochet terms:
ch – chain(s),
sc – single crochet,
hdc – half double crochet,
dc – double crochet,
* – repeat from * to *,
RS – right side,
WS – wrong side,
R. – row or round,
prev. R. – previous R,
st(s) – stitch(es),
motif – repeated sts of the pattern.
If a group of stitches is worked over 6-ch or over 4-ch – place them over these ch-spaces of previous row (without piercing chains).
One square motif:
The diagram for one motif is below.
For better understanding rows and steps are highlighted in different colors. Center of each motif is worked back and forth – this part consists of chains and dc-sts and has a shape of the square (see rows drawn in blue in the diagram). Other rounds are crocheted around this central square.

Chain 12 (count as 9 ch of foundation ch + 2 ch for first st + 1 ch), turn.
R.1: 1 dc in 6th ch from the hook (photo 1), *1 ch, skip 1 ch, work 1 dc in next ch*, repeat from * to * twice more, turn.
R.2: 3 ch (count as 1st st + 1 ch), skip 1 ch of prev. R, work 1 dc in 1 dc, *1 ch, skip 1 ch, work 1 dc in next dc*, repeat from * to * once more, 1 ch, skip 1 ch, work 1 dc in next ch, turn.
Repeat R.2 twice more (4 rows totally) to have a square with 4 x 4 meshes (photo 2).
Crochet around this mesh square, going across just completed R.4, then down along all 4 rows, across the foundation ch, then upwards along all 4 rows. The steps of R.5 are highlighted in pink and green for better understanding.

R.5 (will be on RS): 1 ch (counts as 1 sc), work across R.4 in the direction shown with pink arrow: 2 sc in 1 ch of 1st mesh, skip 1 dc, work 2 sc in 1 ch of next mesh, 1 ch, skip 1 dc, work 1 sc in 1 ch of next mesh, 4 ch, turn (photo 3), skip last made 1 ch, work slip st in next 1 sc, *slip st in next sc (photo 4), turn, work (1 sc, 1 picot, 1 sc, 1 picot, 1 sc, 1 picot, 1 sc) over just made loop of 4 ch (photos 5-8), continue crocheting around the mesh square: work 1 sc next to 1 sc (photo 9), 5 sc in corner mesh (photo 10), 2 sc in next edge-mesh, 1 ch, 1 sc in next edge-mesh (photo 11), 4 ch, turn, skip last made 1 ch, work slip st in next 1 sc, slip st in next sc (photo 12), turn, work (1 sc, 1 picot, 1 sc, 1 picot, 1 sc, 1 picot, 1 sc) over just made loop of 4 ch, continue working around the mesh square: work 1 sc next to 1 sc* (photo 13), 5 sc in corner mesh, 2 sc into space between two dc of next mesh, 1 ch, 1 sc into space between two dc of next mesh, 4 ch, turn, skip last made 1 ch, work slip st in next 1 sc, work from * to * once (photo 14), work 2 sc in corner mesh, slip st in 1 ch in the beginning of the R (photo 15).


R.6 (will be on RS): 1 ch (count as 1 sc), *6 ch, 1 hdc in 1 sc between first two picots (photo 16), 4 ch, skip central of 3 picots, work 1 hdc in 1 sc between central and 3rd picot (photo 17), 6 ch, 1 sc into 3rd of 5 sc in the corner (photo 17)*, repeat from * to * 3 more times, in last repeat work slip st in 1 ch in the beginning of the R. in the corner (photo 18).


R.7 (will be on RS): 1 ch (count as 1 sc), skip 1 ch, *work (2 sc, 1 picot, 2 sc, 1 picot, 2 sc) over 6 ch (photo 20), skip 1 hdc, work (1 sc, 1 picot, 1 sc, 1 corner picot, 1 sc, 1 picot, 1 sc) over 4 ch, skip 1 hdc, work (2 sc, 1 picot, 2 sc, 1 picot, 2 sc) over 6 ch (photo 21)*, repeat from * to * 3 more times, in last repeat work slip st in 1 ch in the beginning of the R (photo 22).
Corner picots will never be connected to other motifs. Join each next motif as you go during crocheting R.7 as shown on next pages.
For connecting second square motif as you go crochet R.7 from first corner to second corner as follows:
R.7 (connecting two motifs together): 1 ch (count as 1 sc), work (2 sc, 1 picot, 2 sc, 1 picot, 2 sc) over 6 ch, skip 1 hdc, work (1 sc, 1 picot, 1 sc, 1 corner picot, 1 sc, connecting picot (photos 23-25), 1 sc (photo 26) over 4 ch, work (2 sc, connecting picot (in the same manner – photo 27), 2 sc, 1 picot, 2 sc) over 6 ch, skip 1 sc, work (2 sc, 1 picot, 2 sc (photo 28), connecting picot (in the same manner – photo 29), 2 sc) over 6 ch, skip 1 hdc, work (1 sc, connecting picot (in the same manner), 1 sc, 1 corner picot, 1 sc, 1 picot, 1 sc) over 4 ch (photo 30), continue crocheting other sides as usually: **work (2 sc, 1 picot, 2 sc, 1 picot, 2 sc) over 6 ch, skip 1 sc, work (2 sc, 1 picot, 2 sc, 1 picot, 2 sc) over 6 ch, skip 1 hdc, work (1 sc, 1 picot, 1 sc, 1 corner picot, 1 sc, 1 picot, 1 sc) over 4 ch**, repeat from ** to ** once more, work (2 sc, 1 picot, 2 sc, 1 picot, 2 sc) over 6 ch, slip st in 1 ch in the beginning of the R.
connecting picot: 1 ch, take the hook out and insert into respective picot of already completed
square motif (photo 23), pull through (photo 24), 1 ch, slip st to finish this picot (photo 25).

For connecting one square motif at its two sides join 4 picots on these two sides in the same manner.
Connections between picots are shown with black thin lines in the diagram 2. For joining one square at all four sides join 4 picots on each of 4 sides to respective picots of already completed squares (photos 31-35):
R.7 (connecting one motif at all 4 sides): 1 ch (count as 1 sc), **place (2 sc, 1 picot, 2 sc, connecting picot, 2 sc) over 6 ch, skip 1 hdc, work (1 sc, connecting picot, 1 sc, 1 corner picot, 1 sc, connecting picot, 1 sc) over 4 ch, work (2 sc, connecting picot, 2 sc, 1 picot, 2 sc) over 6 ch, skip 1 sc**, repeat from ** to ** 3 more times, in last repeat work slip st in 1 ch in the beginning of the R. Count 16 connected picots on each of 4 sides.

Join all motifs as you go (as suggested in the diagram below) and arrange into one big square or a rectangle of the desired width and length.

Happy crocheting!
HOW to Add Your Project to Ravelry
Download the printable PDF-version with no adds, without watermarks for a small fee – press on this link conceptcreative.store/incantation-crochet-tablecloth
Download PDF for working these motifs without breaking the yarn (in one piece):
https://conceptcreative.store/PHOTOtutorial-for-working-in-ONE-PIECE
Now see this video about removing 3 excessive square motifs ?.


Thank you!
I’m impressed, I have to admit.
Hi
Thank you for sharing your lovely tableclpth pattern ? You mention in the top of page: (below). Please can you say where is this? Thank you ?
“…Later I will post an additional photo tutorial on how to make such crochet squares without breaking the yarn – my usual formula on making any motif-project without ruining the beautiful yarn and hiding all ends….”
Hi KK, thank you for your interest!
When you press on the link in the article you’ll come to the section WHAT’S MORE and see this paid PDF: https://conceptcreative.store/shop/curtains-tablecloth-crochet-pattern-pdf-in-english
It contains 3 PDF:
► written tutorial in ENGLISH with all necessary charts and photos on how to make a TABLECLOTH;
► written tutorial in ENGLISH with all necessary charts and photos on how to make two types of CURTAINS;
► additional written and charted tutorial with 77 photos illustrating our NO-YARN-BREAKING concept for these motifs.