***
June, 27th, this is how my tunic and knee-length dress look like (in the next few days I’m going to edit this crochet pattern):


In last part 5 we are going to crochet different edges – shell edge or fringed edge along the bottom, armhole edges and neckline edge (please, scroll down to the description).
We have one week to finish this project. And then I go on holiday ???, so will not be able to help you with ideas, additional drawings, calculations, etc. – this part will remain not password protected if you need more time to complete part 4 and I’m not around.
We have crocheted much in June, and I was all yours during this month (while I was working on this project too). It was such an interesting experiment for me and I’m very grateful for the encouragement I have received from all Ravelers.
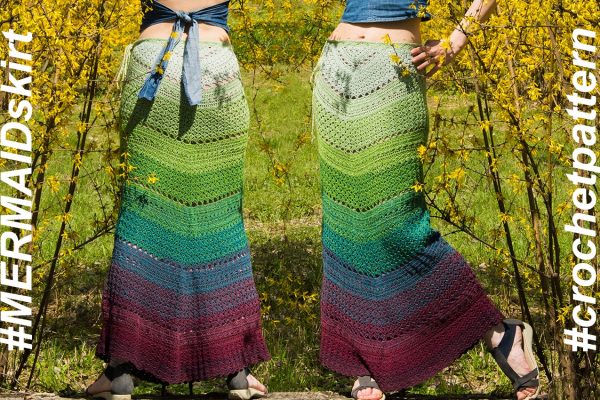
As promised, all crocheters who have finished their projects by June 30th, 2019 will receive two free crochet patterns: fringe top and triangle-tunic-dress, calculated for my tension (gauge) and 6 adult sizes.
All crocheters who have finished their projects by July 31st, 2019 (when I return from holiday) will receive one free crochet pattern: fringe top.
All other crocheters (including participants who have not finished this free CAL by July 31st, 2019) will be able to purchase the usual PDF-printable versions of both patterns from Ravelry, Etsy and my shop.
So, let’s finish it faster!
Armhole edges (make two):
Attach yarn to the under arm section. Work two R. of LSP around the armhole edge. Crochet right side facing and in the round, finish each R. with slip st in 1st ch in the beginning of that R.
In R.1 skip the distance of 1 st under all 1-ch.
For R.2 you may use a smaller hook to prevent the edges from stretching out or to gather any excessive width at armholes.
Neckline edge:
Attach yarn to the shoulder; work 2 rows of LSP around the neckline the same way as for armholes.
Bottom edge variants:
Shell edge
Crochet as R.11,12,13 of the diagram 1 (it was published in part 2), but work in the round as described below. While crocheting last R. before 5 htr shells adjust total amount of sts so that it is a multiple of 10.
- Last R. before the shell edge: 3 ch (count as 1 hdc + 1 ch), 1 hdc in 1st ch after slip st, 1 ch, skip 1st sc, *work 1 hdc in 1 ch, 1 ch, skip 1 sc*, repeat from * to * across the R, skip last sc, work slip st in 2nd ch of this R, slip st in next ch, turn (for increasing 1 st work 2 hdc in 1 ch, place all increased sts at more or less equal distances).
Mark the center of the Front. Remember that every shell motif is worked over 10 sts of prev.R. You might need to shift the beginning of the R. to place edge shells mirror-like from the center.
- R. with 5 htr shells: 2 turning ch (counts as 1 hdc), *[skip (1 hdc, 1 ch), work 5 htr in 1 hdc, skip (1 ch, 1 hdc), work 1 hdc in 1 ch, 1 ch, skip 1 hdc, work 1 sc in 1 ch, 1 ch, skip 1 hdc], work 1 hdc in 1 ch*, repeat from * to * across the R. in last repeat work the sts in [brackets], finish with slip st in 2nd ch of this R, turn.
- R. with 6 puffed shells: 2 turning ch (do not count as 1 st), work 6 puffed shell over each 5 htr shell the way you worked before, finish with slip st in 2nd ch of this R.
Crochet final R. wrong side facing: work 1 slip st into each puff st and into each 1 ch (use a bigger hook if you tend to work slip sts too tight); finish with slip st into last st. I suggest to insert the hook under both loops of the previous R. – so that you have 2 loops above the hook.
You may crochet the final row differently (choose the one you like best, finish with slip st):
- work row of slip sts through front loop or through back loop only;
- work row of slip sts right side facing;
- crochet row of crab sts;
- work picot edge: repeat *1 sc into space between puff sts, 1 picot of 2 ch or 1 picot of 3 ch*;
- work LSP-R: repeat *1 sc into space between puff sts, 1 ch*;
- or add little fringe between puff sts.
Fringe:
I have added fringe to the LSP-R. right under the panel with puff sts, but you can add fringe to any other R.
Each of my fringe-section consists of 6 strands and is attached to 1 ch under 3-dc-group. Count the amount of 3-dc-groups in your panel with puff sts and multiply it by 6 (this number is how many fringe pieces you need to cut). Cut lengths of drapey yarn 25.5 cm (10’’) long. You can use fewer strands for each fringe-bundle, cut shorter strands or space them farther apart – it really depends on your taste, fringe-yarn and on how thick you wish to have each bundle.
For adding each fringe bundle line up the desired number of strands and fold them in half. Place your work wrong side facing. Insert your crochet hook from the wrong side to the right side at the point you want the fringe. Grab the folded yarn with the hook and pull it part way through to form a loop. Make sure you pull through all the strands. Pull the ends of the fringe through this loop, then pull tightly to knot it.

You can leave fringe as it is or make another knot:
Divide two adjoining fringe pieces into equal parts (6 and 6), join their ends together. With your finger or hook create a loop in the upper part of this joined fringe piece. With your hook pull all ends of this piece through the loop to create a knot. With your fingers move the loose knot upwards to the desired length, tighten the knot.
Trim any straggly ends with scissors once all fringe parts will be completed.


Congratulations on finishing your top, tunic or dress! Please share your successfully completed project on Ravelry.
Please tag #conceptcreativestore and #summer_mystery_cal to inspire Instagram-crocheters.
Thank you and see you next time! ?
Copyright
Photos, Charts and Row-by-row instructions that you will see during this CAL are property of conceptcreative.club, conceptcreative.store, conceptcreativeblog.wordpress.com, conceptcreativestore on Ravelry, conceptcreativestore on Etsy. Printable PDF will include all materials you see on my website, along with the colorful charts. Any reprinting, transmitting, reproducing, publishing or otherwise using for commercial purposes parts of this tutorial is strictly prohibited without my prior written permission.
You may sell as many ready made crochet garments as you want, provided that you post your own photos and give link to respective pattern by Conceptcreative.store on Ravelry.